- Published on
- Last updated on
- Last updated on
Build a cheap but fast home NAS system
- Authors

- Name
- Daniel Demmel
- Occupation
- Software engineer with
21 years of professional
experience
Motivation
A couple of weeks ago I found out that Synology does not offer the latest (7.2+) DSM update for my Diskstation 213j. Which is fair enough, it's around 10 years old, so in a way I'm grateful for them to have offered OS updates until now. At the same time, this made me finally consider what's next.
I've been reading about Permacomputing (that I discovered through Devine of Hundred Rabbits fame, thanks!) echoing the "appropriate technology" idea of E. F. Schumacher and permaculture, so I was also considering that – even though I would like a more powerful NAS than the current one – being a little home server it really doesn't need to be the latest technology or even a new device.
Tiny PC as NAS
So I set out to do some research, trying to find something that is small, low power, and cheap, but still fast enough that I will be able to run free, open source replacements for some commercial services like Google Photos (which is a topic for a later post) and I won't need to replace it for a few years.
Coming across Project TinyMiniMicro I found out about the whole class of mini PCs that are used in corporate settings (often mounted on the back of monitors) and are abundant on the second hand / refurbished market. These include product lines such as:
- Lenovo ThinkCentre Tiny
- HP EliteDesk / ProDesk Mini
- Dell OptiPlex Micro
This paragraph on the linked Project TinyMiniMicro page describes them perfectly:
All of these are a similar size, use external power bricks usually shared with their respective company’s notebook lines. There are usually internal spots for 2.5″ and NVMe SSDs as well. Almost all of them also have the ability to customize the display outputs. All have DisplayPort, some have a mix of HDMI and VGA as well. All of our test units fall in the 10W or so idle to 64-68W maximum power consumption range even while spanning 2-6 cores. Performance ranges from somewhere in the Atom C3000 range to the lower-middle of the Xeon E-2200 range.
In other words, you can get desktop CPUs (and performance) with 2 hard disk slots in a tiny package that will have a low idle power consumption, but can rev up to handle some more serious computation when you need it.
Buying one
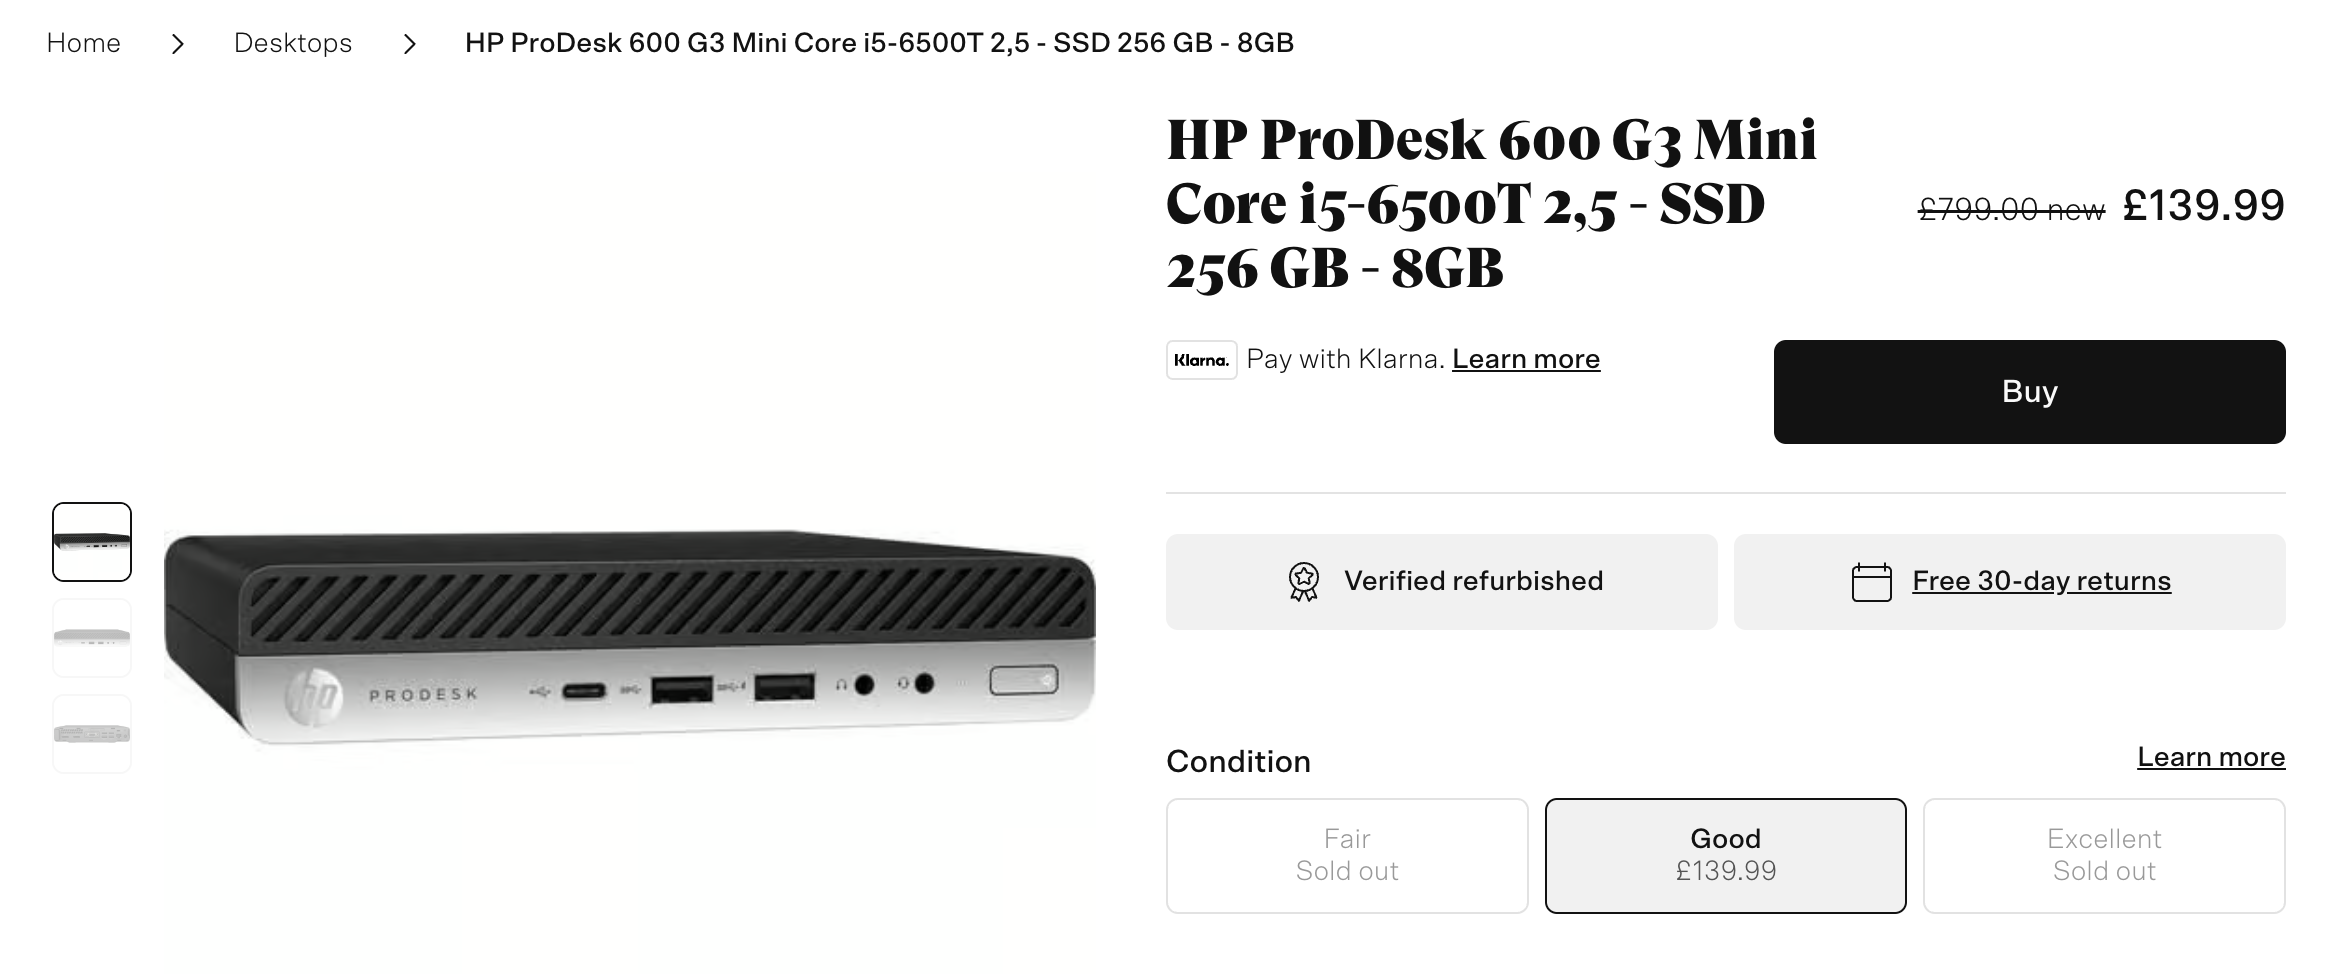
First, I found a refurbished HP ProDesk 600 G3 Mini for £140 on BackMarket which is not a bad deal considering that it comes with a year of warranty. Edit: that model might be out of stock, but have a look in the main Desktop category, there's a similar one for £79 currently (December 2023)! (You can also use my referral code cda927c192398477 on BackMarket for £10 off.)
But I didn't really want the smallish 256GB SSD it comes with, so I spent a few hours hunting around on eBay, put in a cheeky offer of £80 for a second hand unit that came with a bit more RAM too and got lucky 🍀
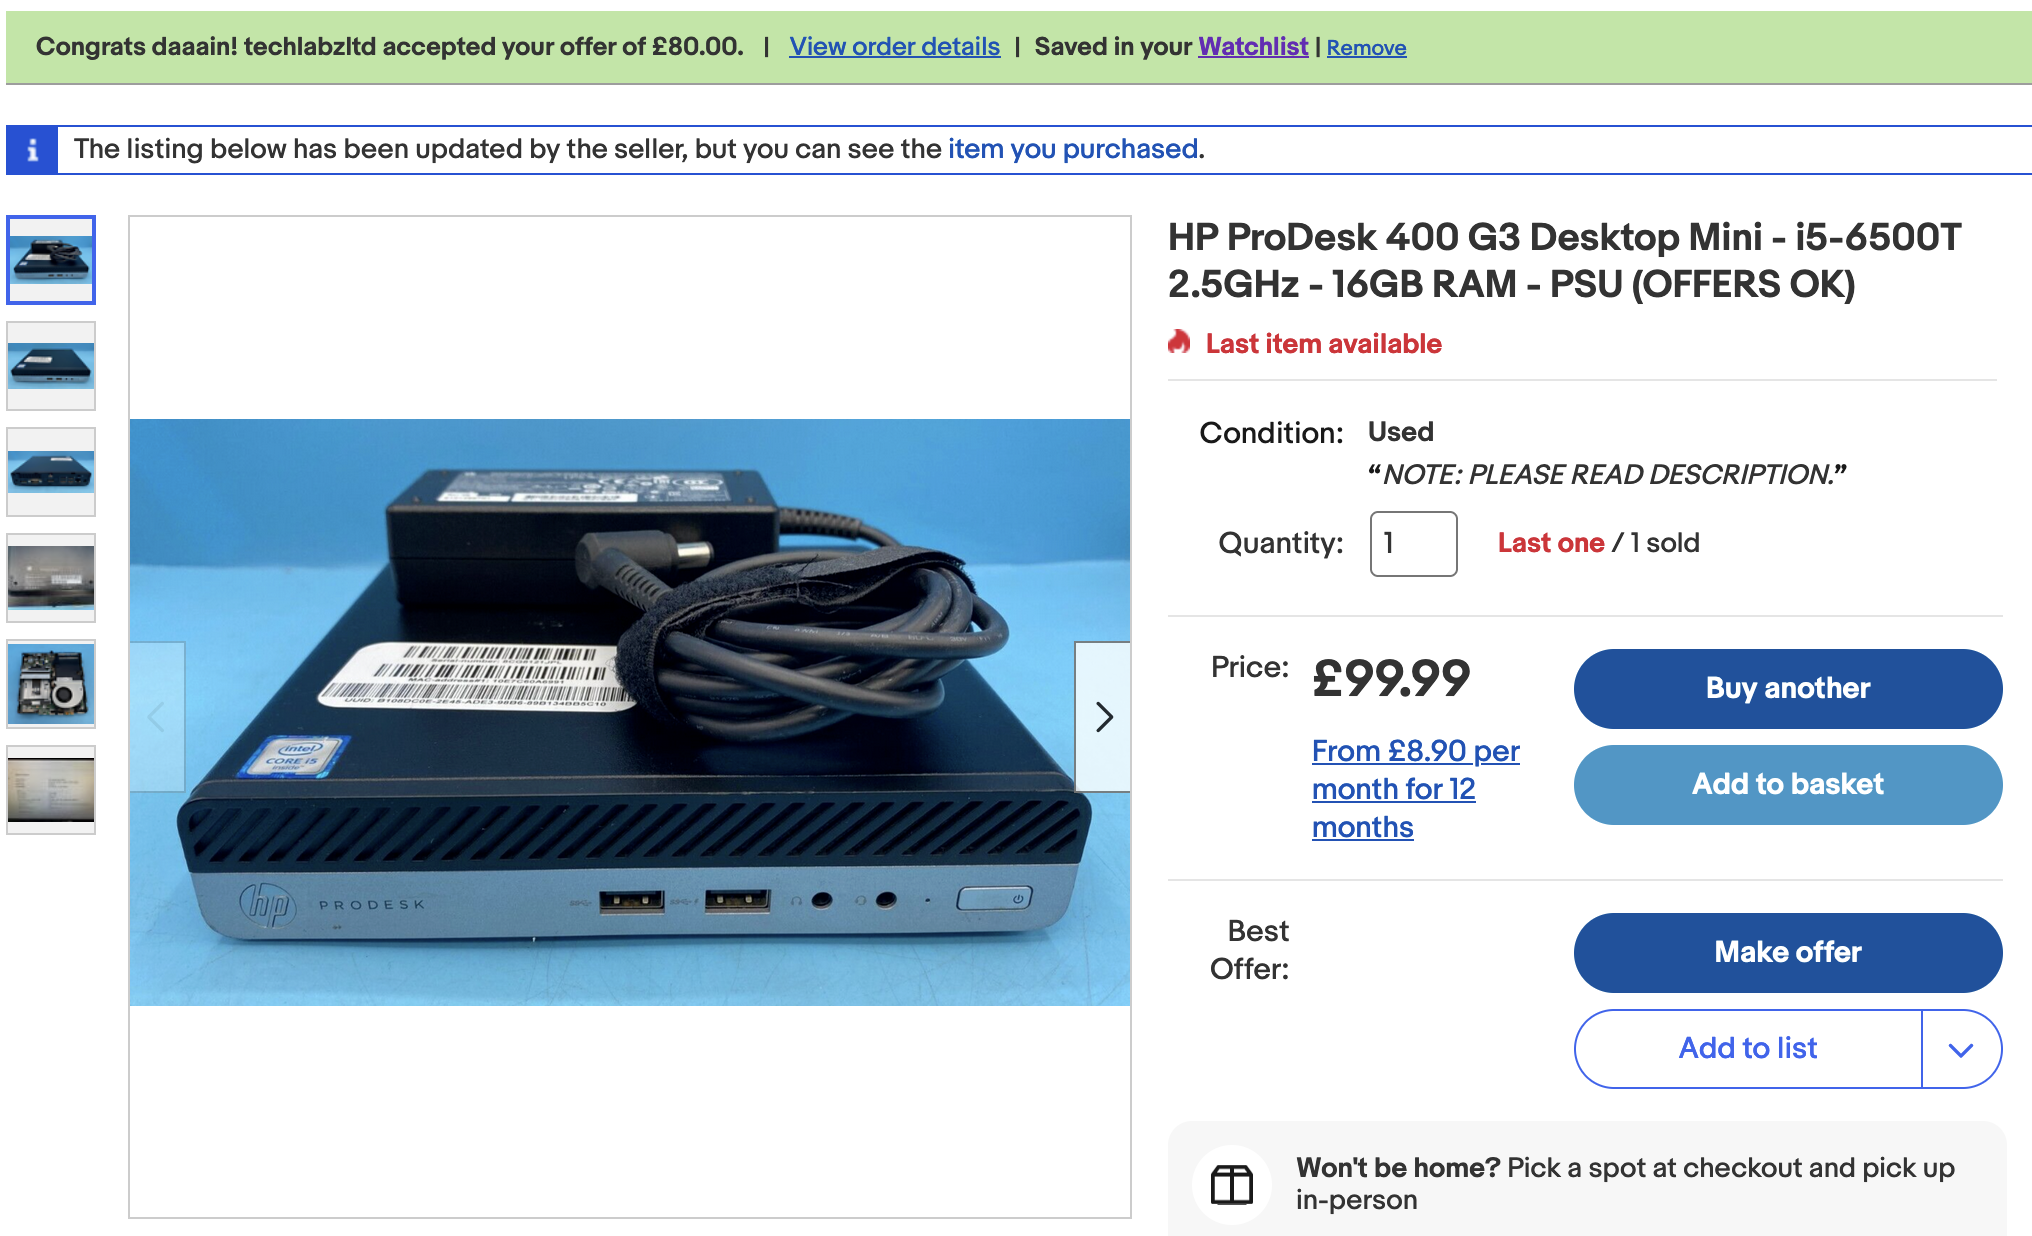
For choosing the right CPU it took me a while to realise that Intel has a relatively decent naming and numbering scheme where the first 1-2 digit is the generation, the following 3 digits are the class (i3/i5/i7) and the "T" postfix is the low energy version that I can highly recommend for this use case (35W peak instead of 60W). So in case of my 6500T, it's a low energy 6th generation i5. That currently seems to be the best value, but you could try looking for 7500T or 8500T (those are especially nice as from that generation there are 6 cores instead of 4) too and see if you get lucky. I'd avoid any Atom or Celeron ones (unless you're going for super low power) as they are very slow, get i3 only if it's very cheap and a recent generation and skip i7 as usually it's a bit overpriced.
As for the RAM, I know I want to run some basic machine learning models for photos and do some video transcoding, so getting 16GB is the minimum to prevent crashes without swapping.
Comparison to an Intel Synology model
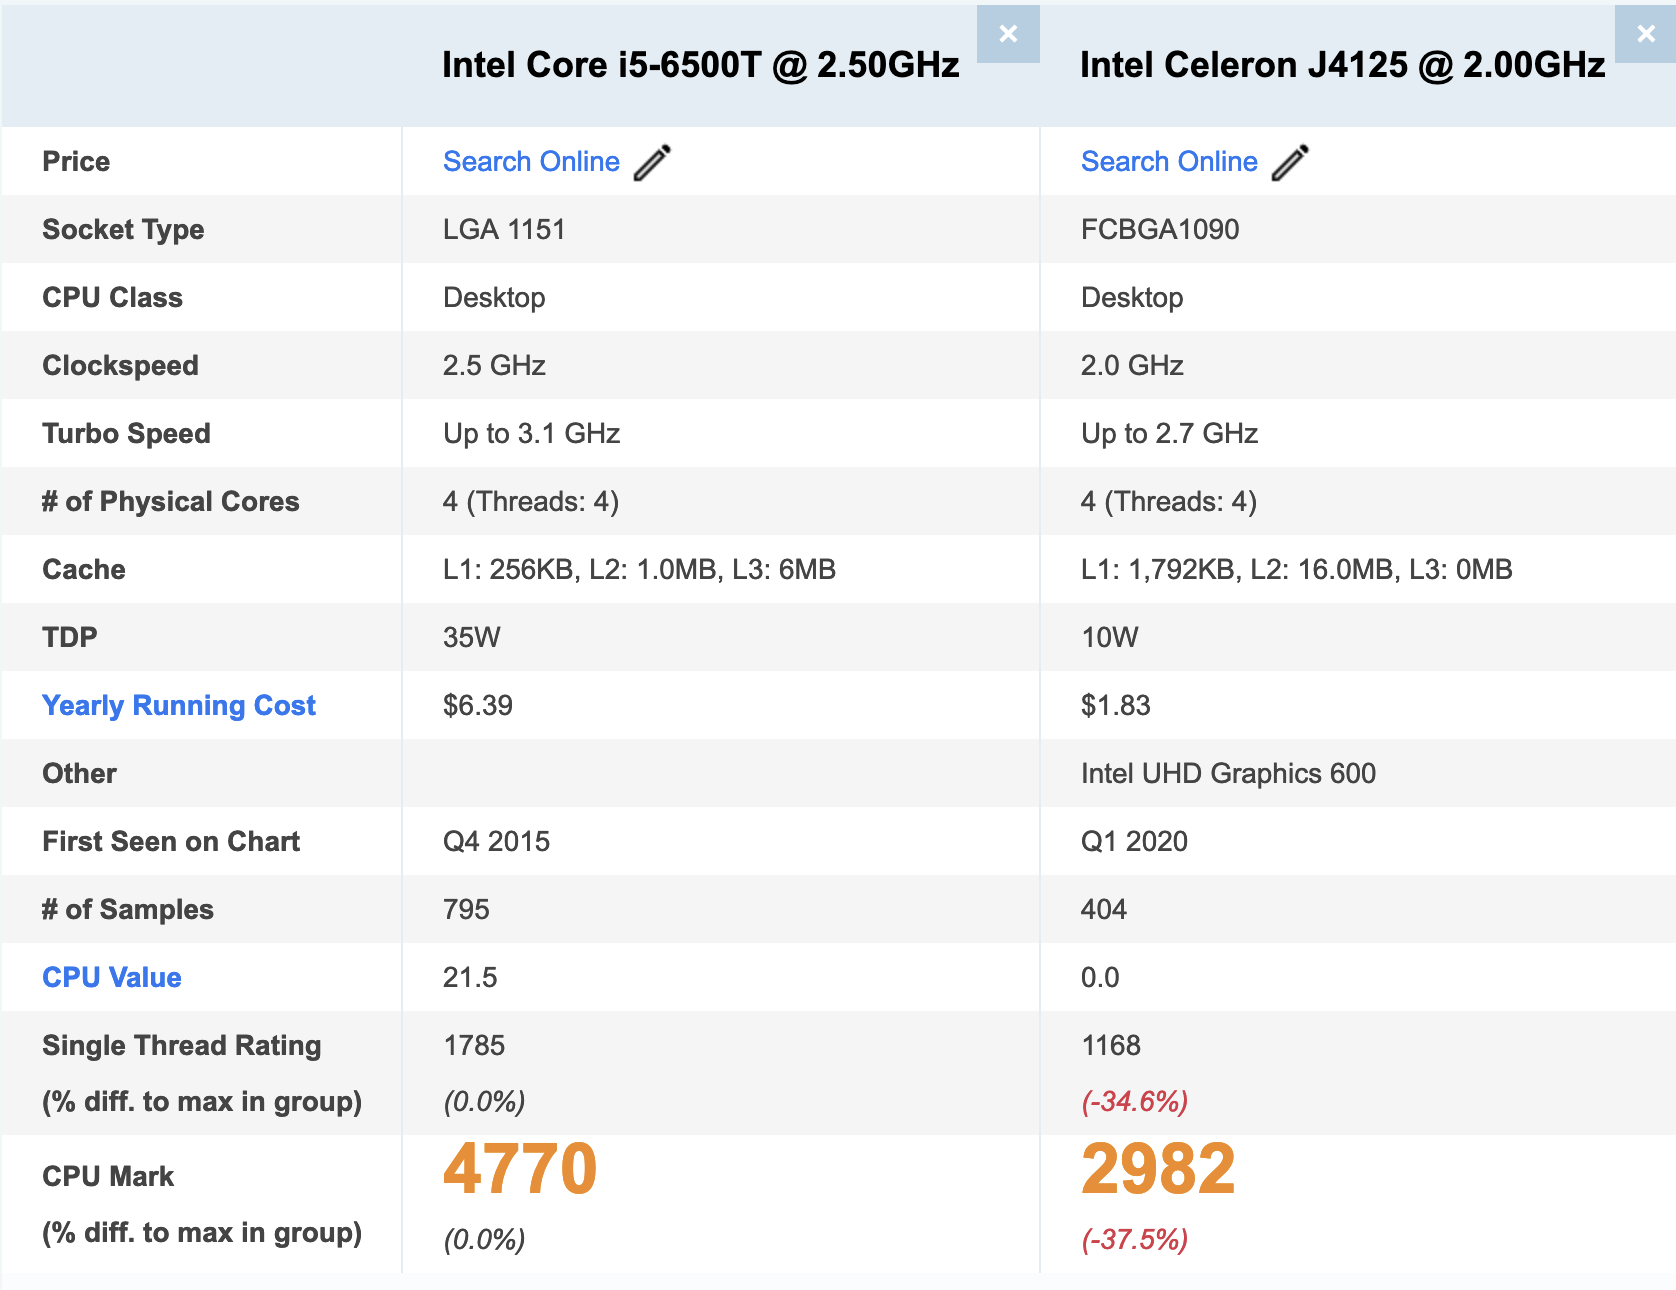
Just for fun I wanted to see how much an Intel based Synology with similar specs would be, but it doesn't look like they cater to that market. You need to scale up the physical size / bay number beyond home use to get better specs, but the DS423+ with Intel Celeron J4125 and 2GB RAM is maybe a realistic one to pick. It has 4 bays which is already a bit too big for me, but the CPU is more than a third slower (though it does use much less power and has more cache) and the 2GB RAM is just measly. This still costs £519.98 nonetheless...
SSD storage
I don't want to risk my personal data being lost, so the hard disk is the only component that I had to get new. I just haven't heard of ways either HDDs or SSDs could be refurbished and they have a limited lifetime before bad sectors crop up, so unfortunately we're stuck with buying new for the time being. I will (hopefully) use these for a long time myself, the decade old WD Red HDD in the current NAS will become a backup disk.
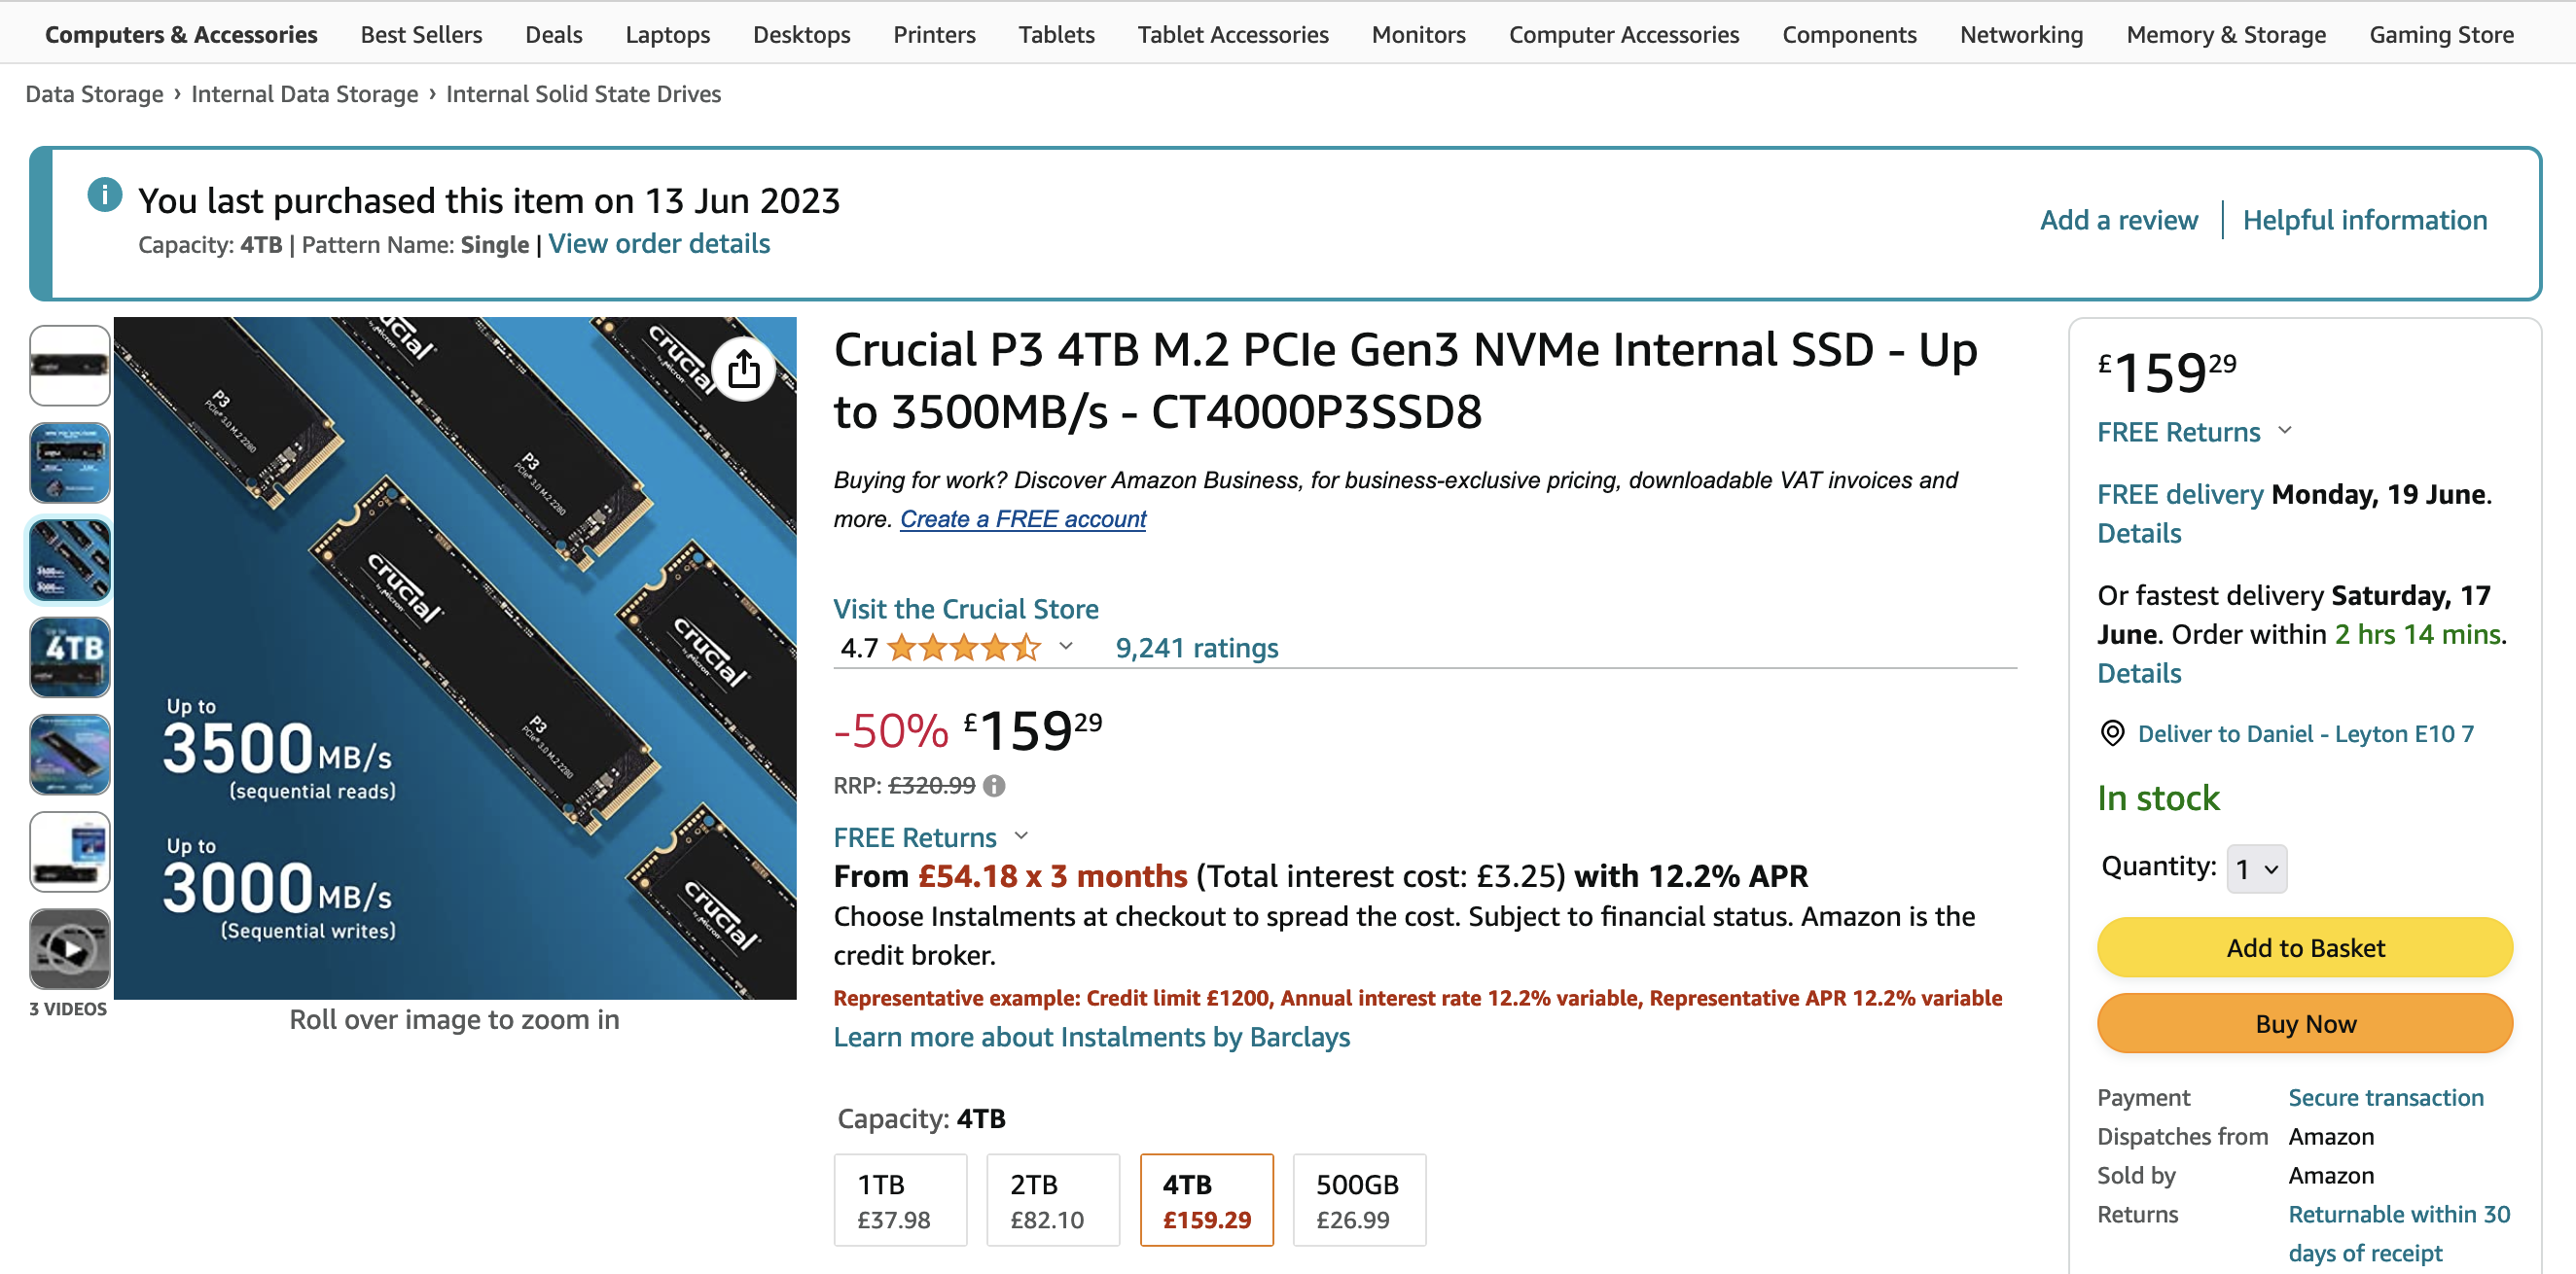
A really important development to make this build much more desirable is the steep drop of SSD prices a month or so ago, as I wouldn't want to pay loads or end up using super slow 2.5″ spinny HDDs any more. The 4TB disk in my current NAS is 70% full so wanted to get an SSD with the same capacity, so I was bracing myself for eye-wateringly expensive drives, but to my pleasant surprise found the Crucial P3 4TB M.2 2280 NVMe internal SSD for £160! Considering its 3500MB/s sequential read speed and 5 year warranty this isn't a low grade piece of hardware, though of course there are much faster ones on the market for gaming rigs. I'm running a relatively basic router so with local network speeds hardly reaching 1Gbps this is already way faster than what I'll be able to max out in most cases.
Installation
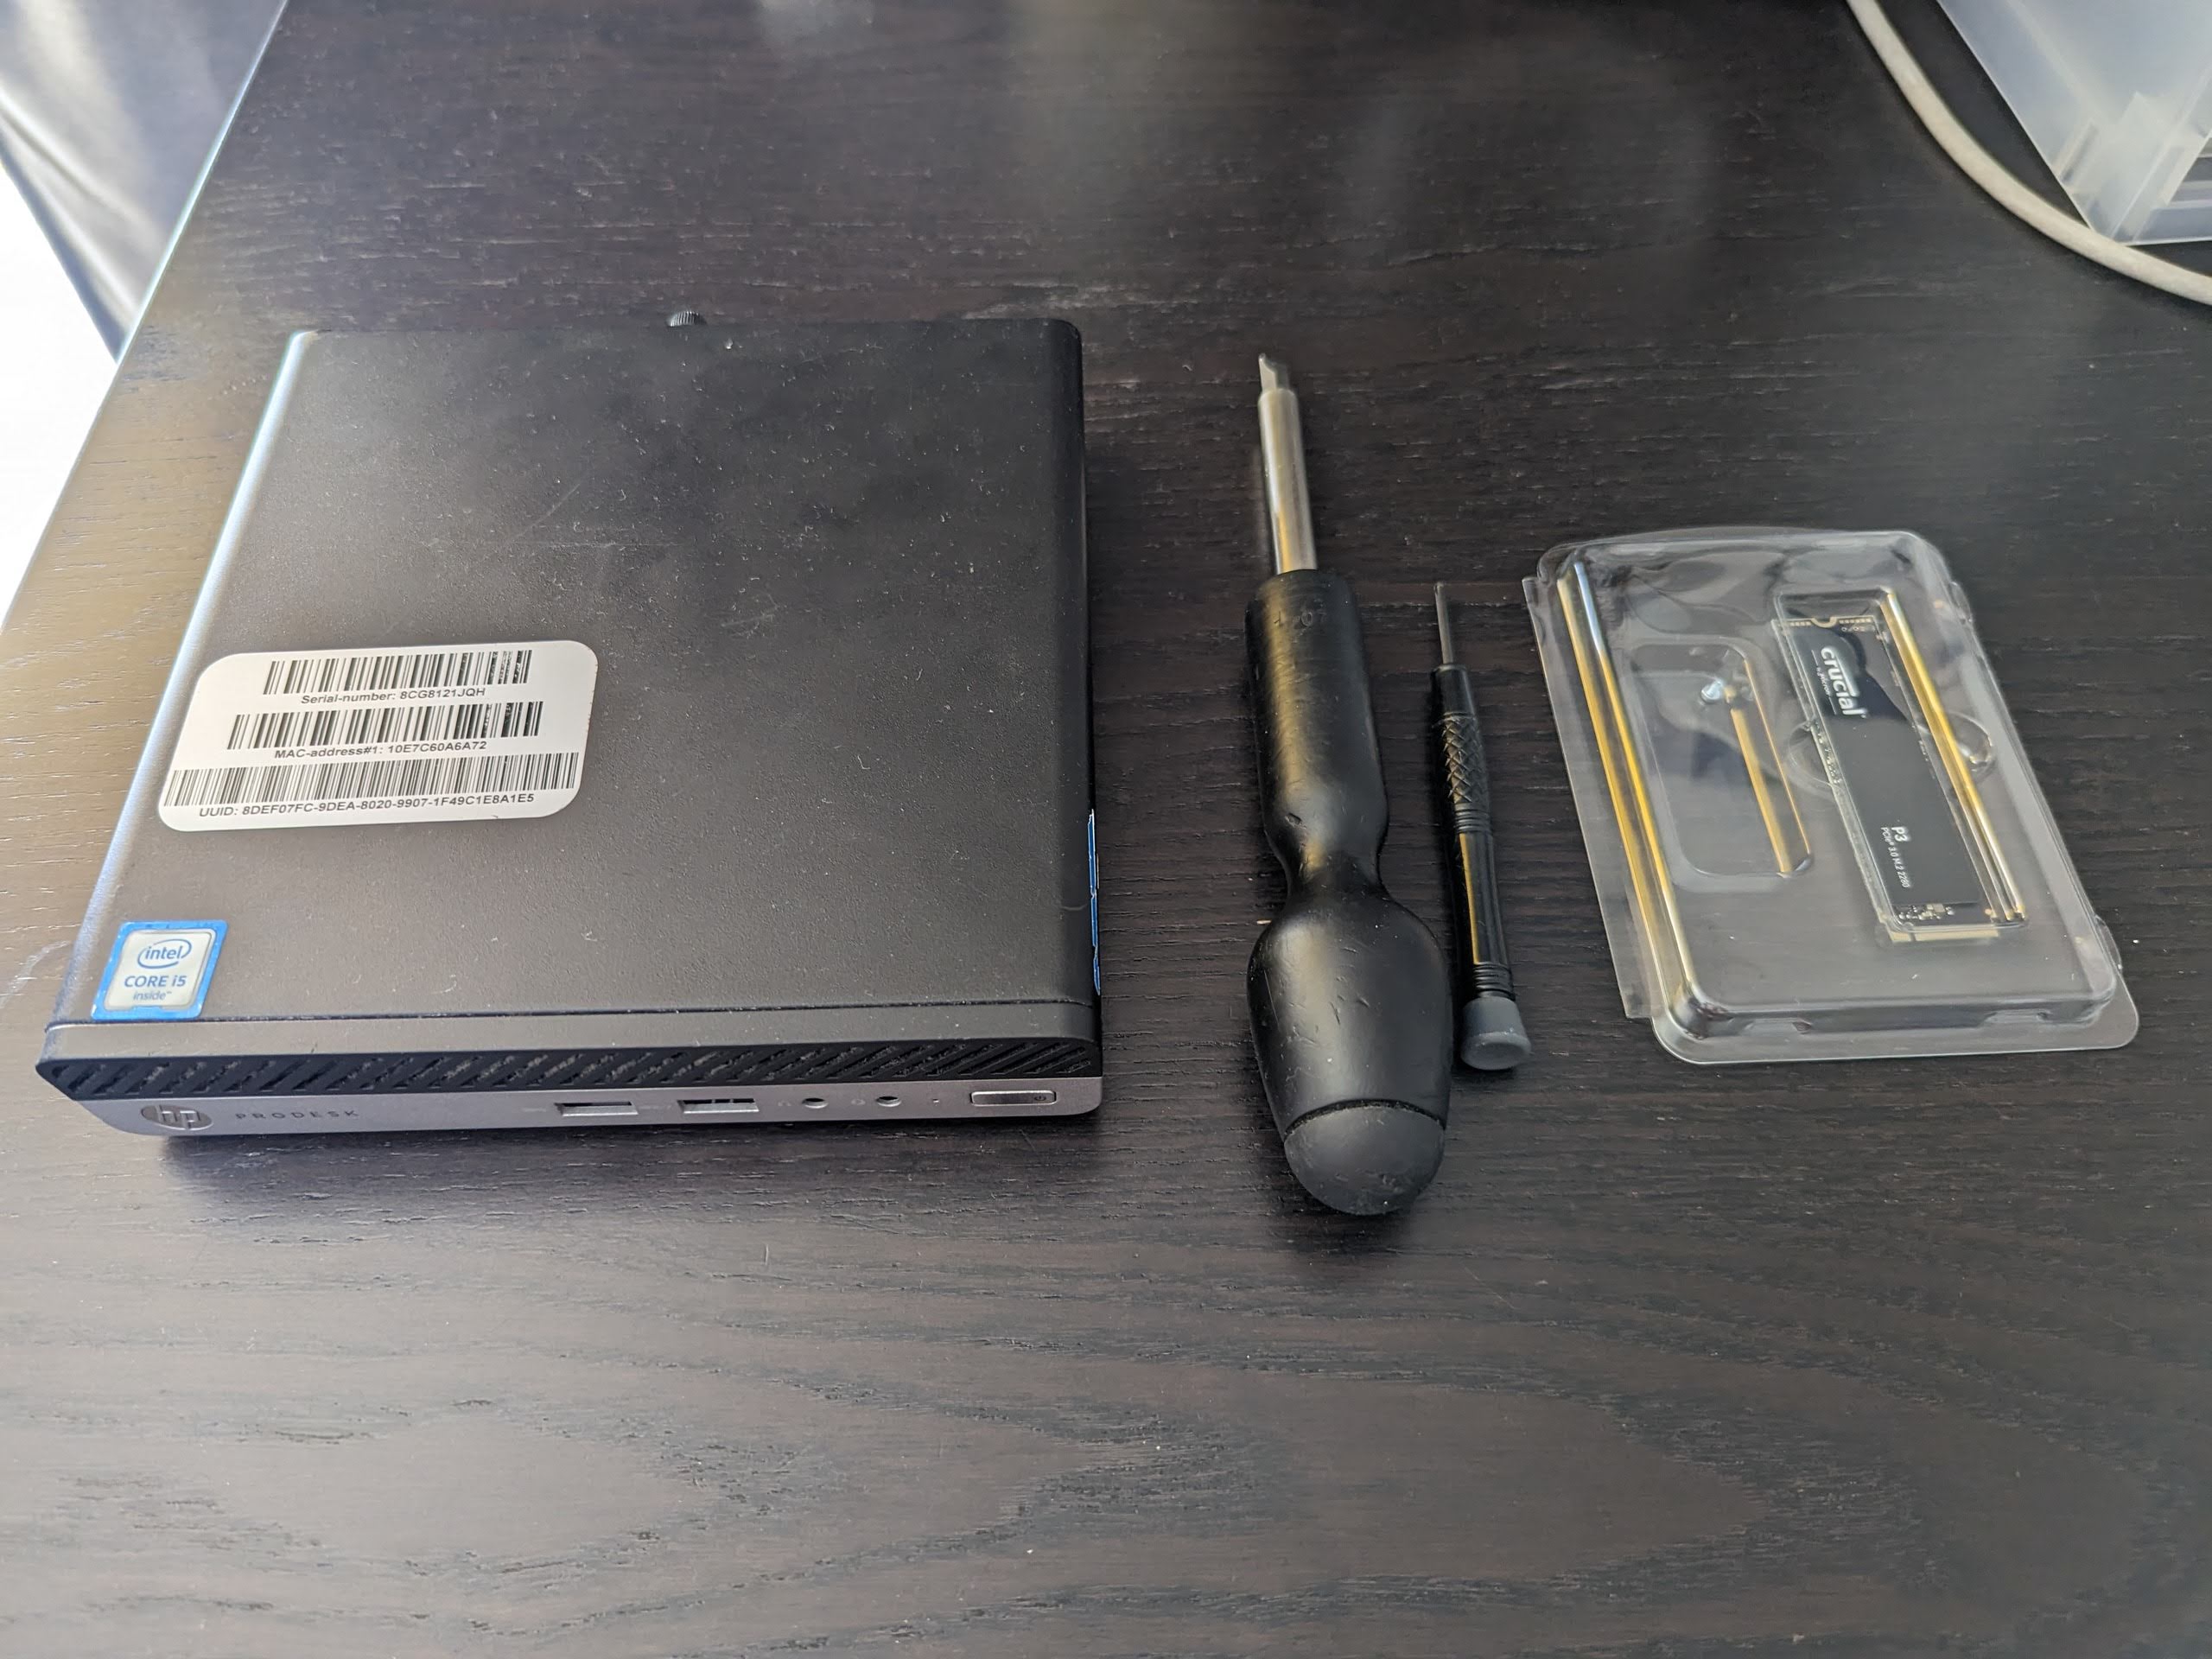
I took photos of each step, this particular HP is even a bit harder to work with as it's not completely tool free, but you only need a bigger flat-head screwdriver to remove the 2.5" bay and a small Phillips one to bolt the M.2 2280 stick down.
1. Prepare everything
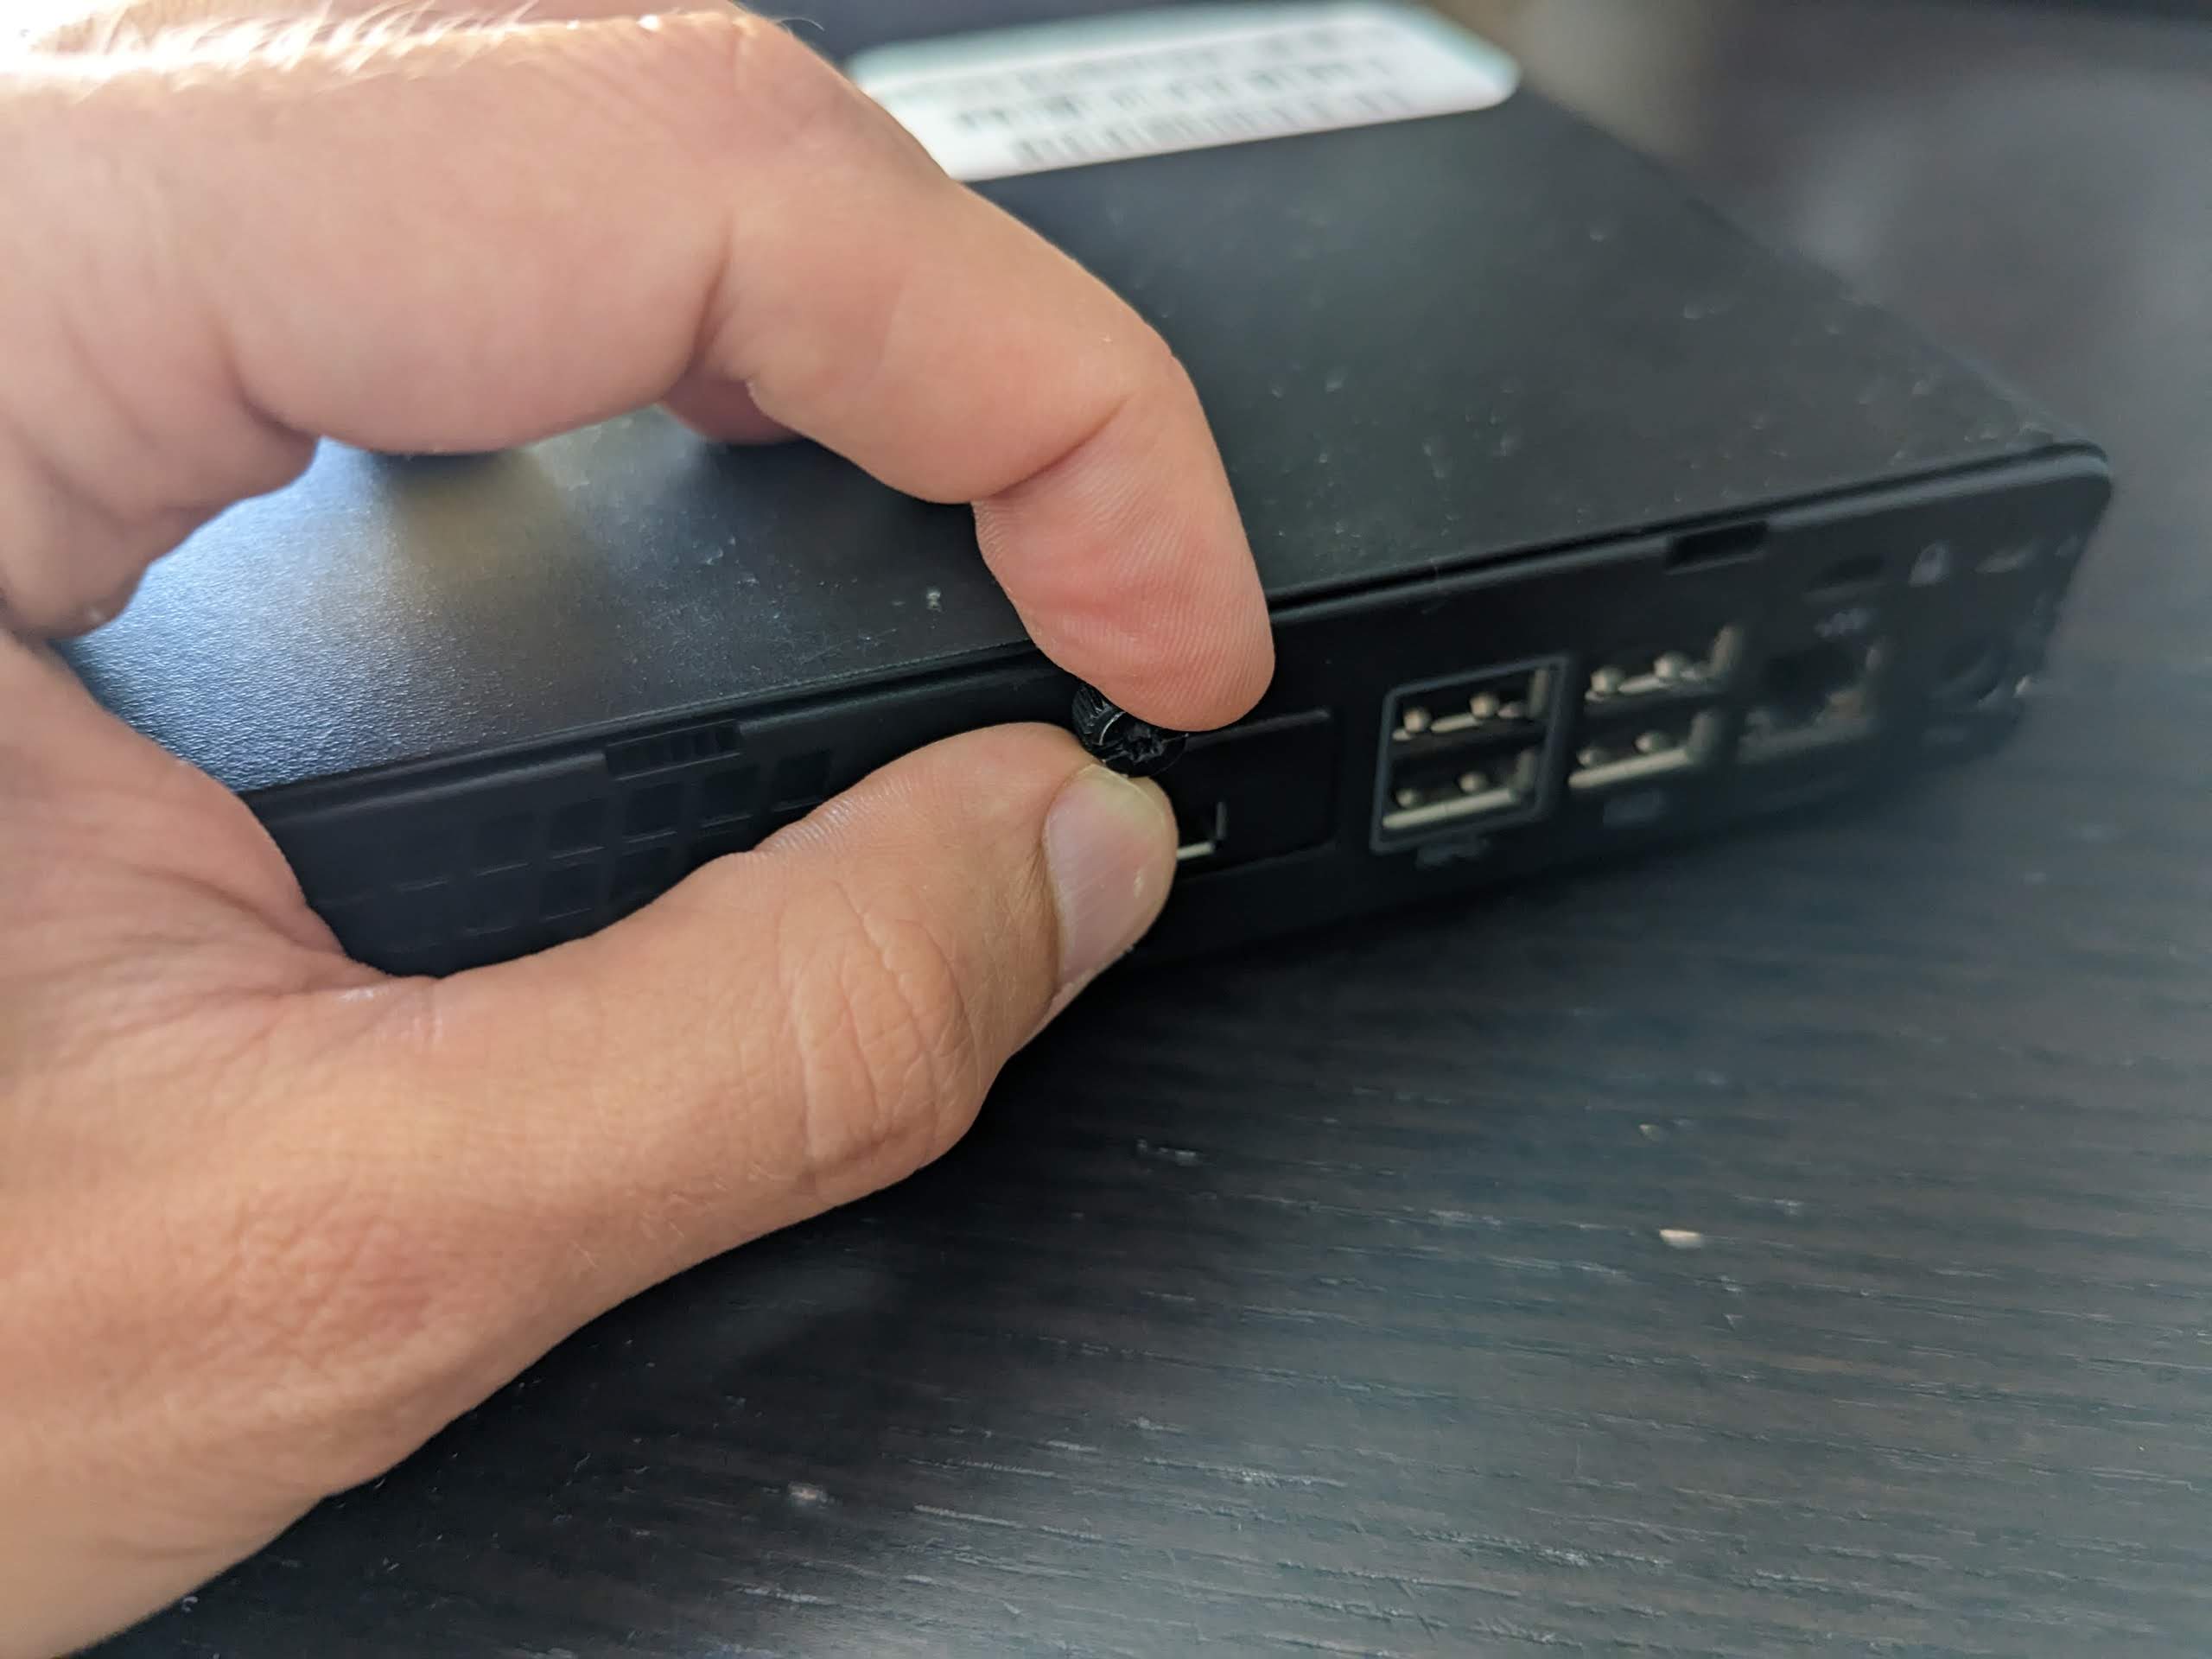
2. Open the case with the thumbscrew
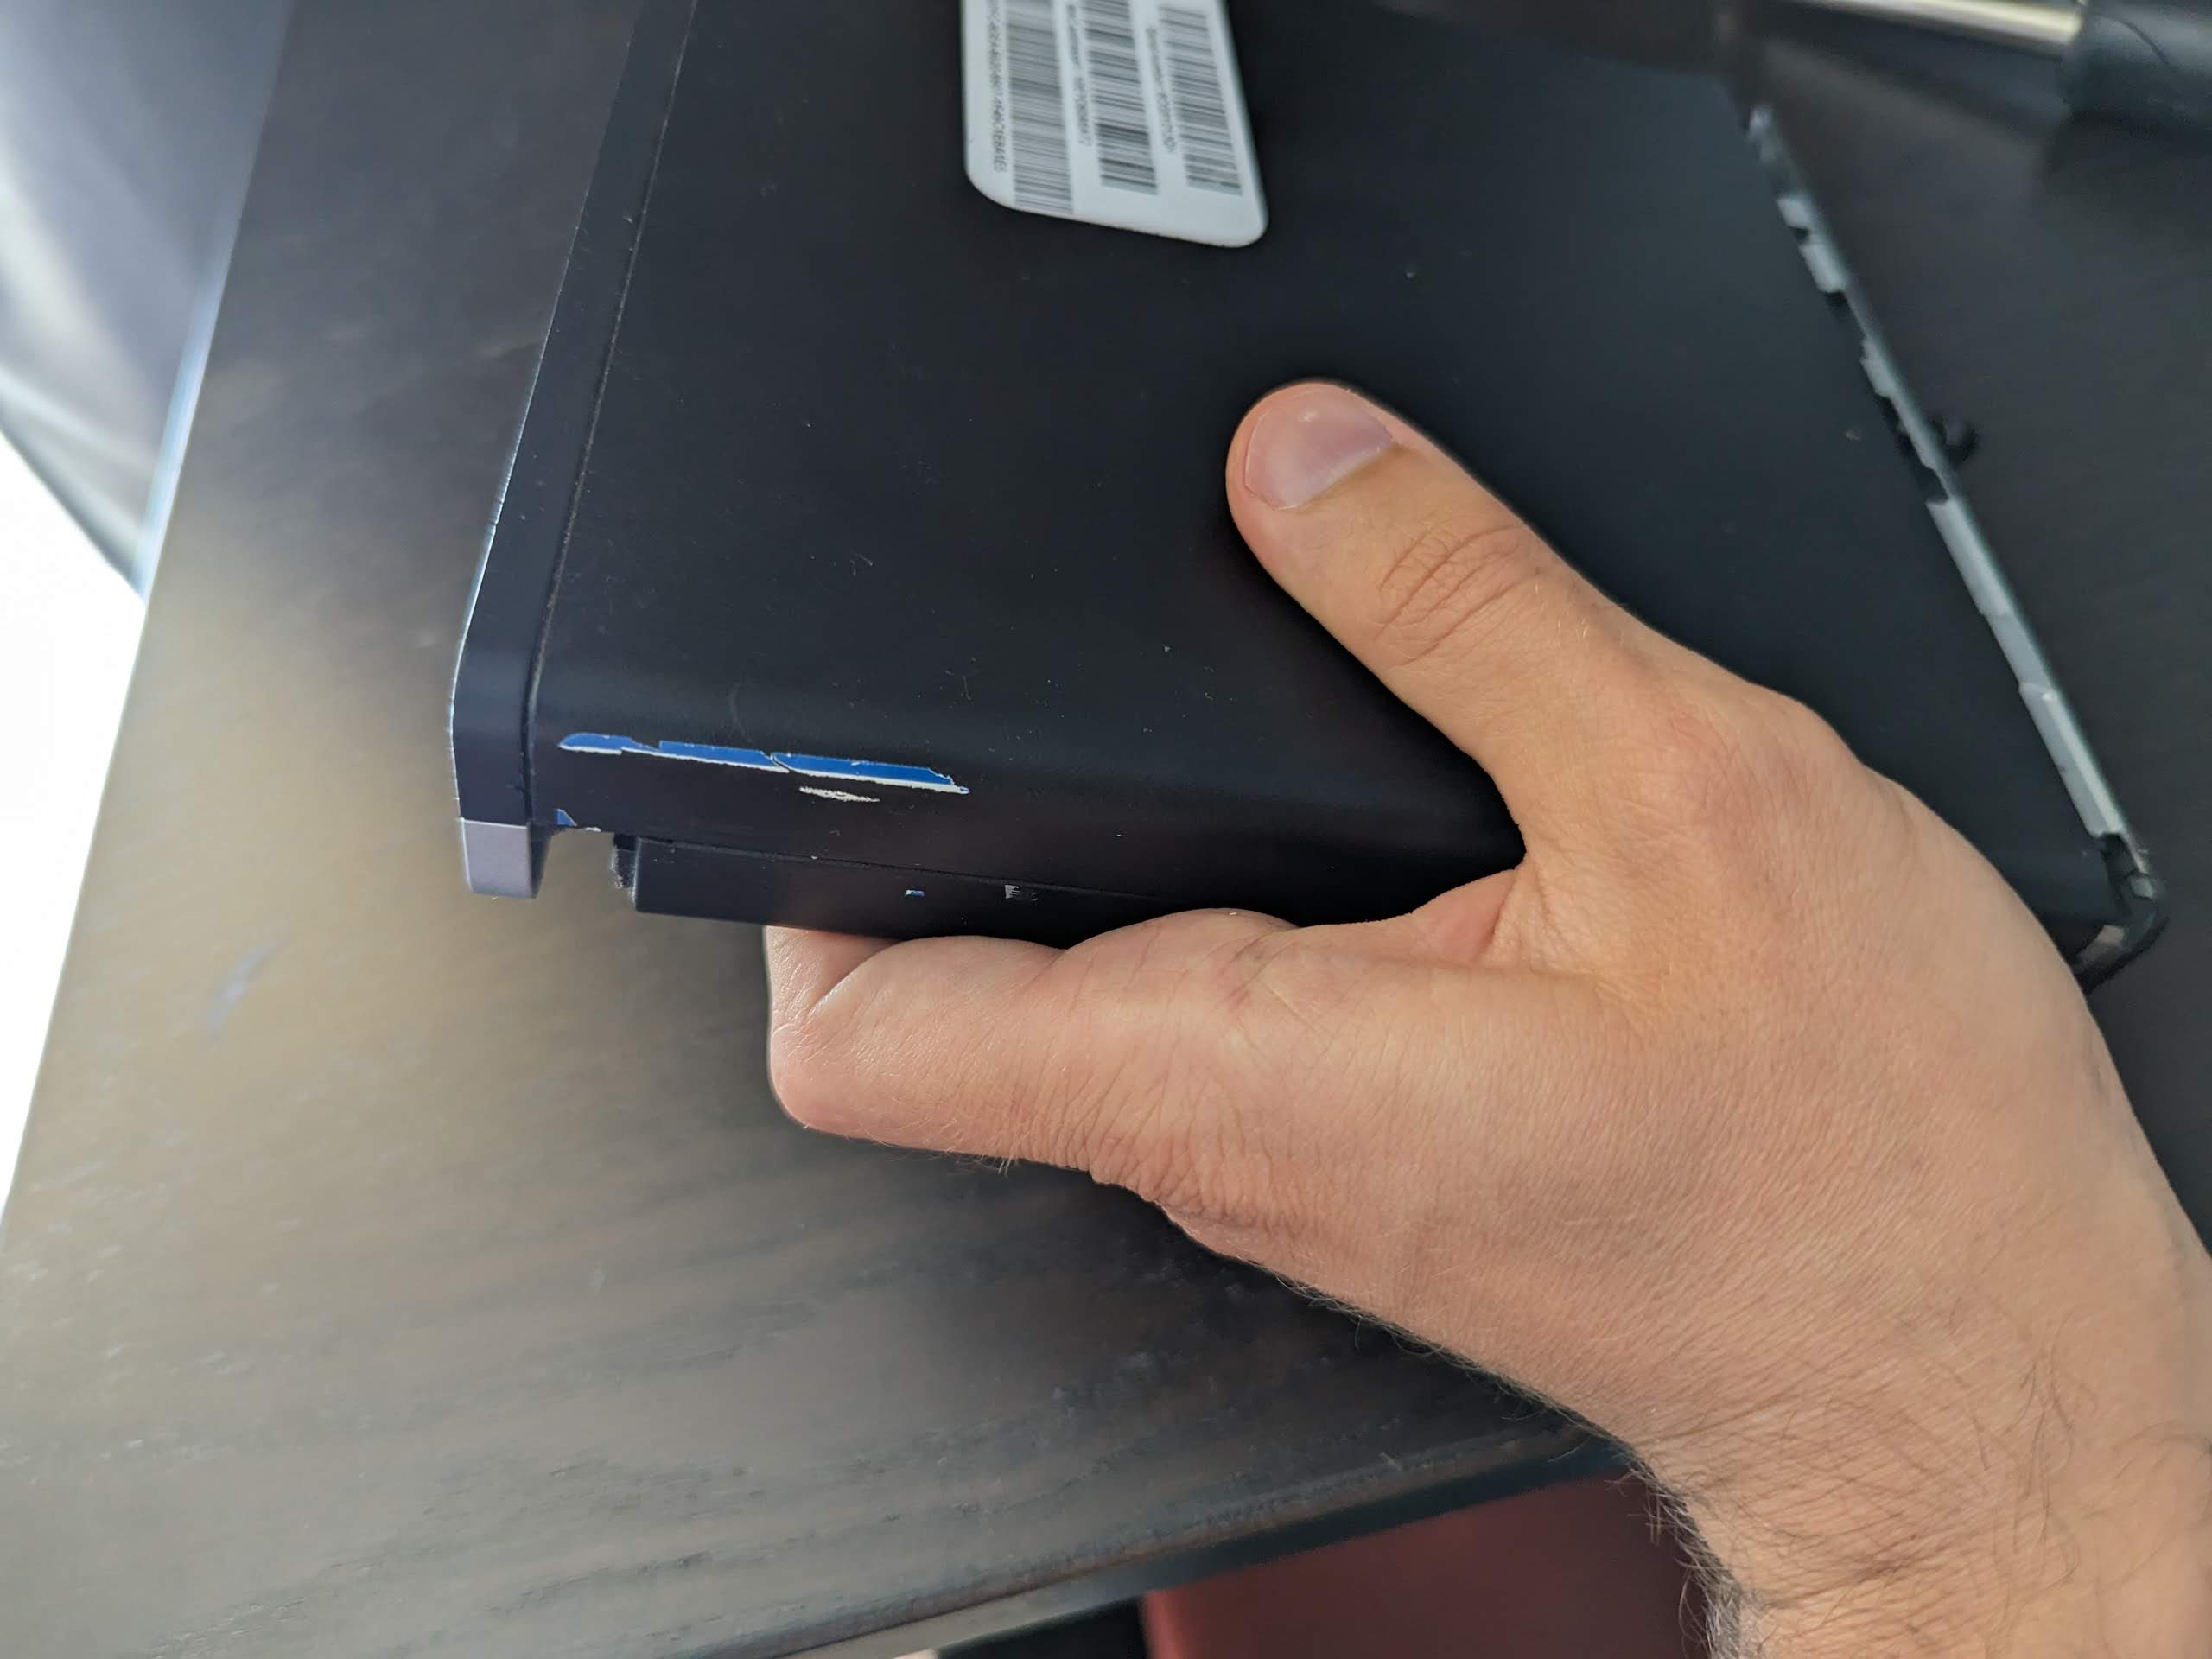
3. Slide the case off a bit
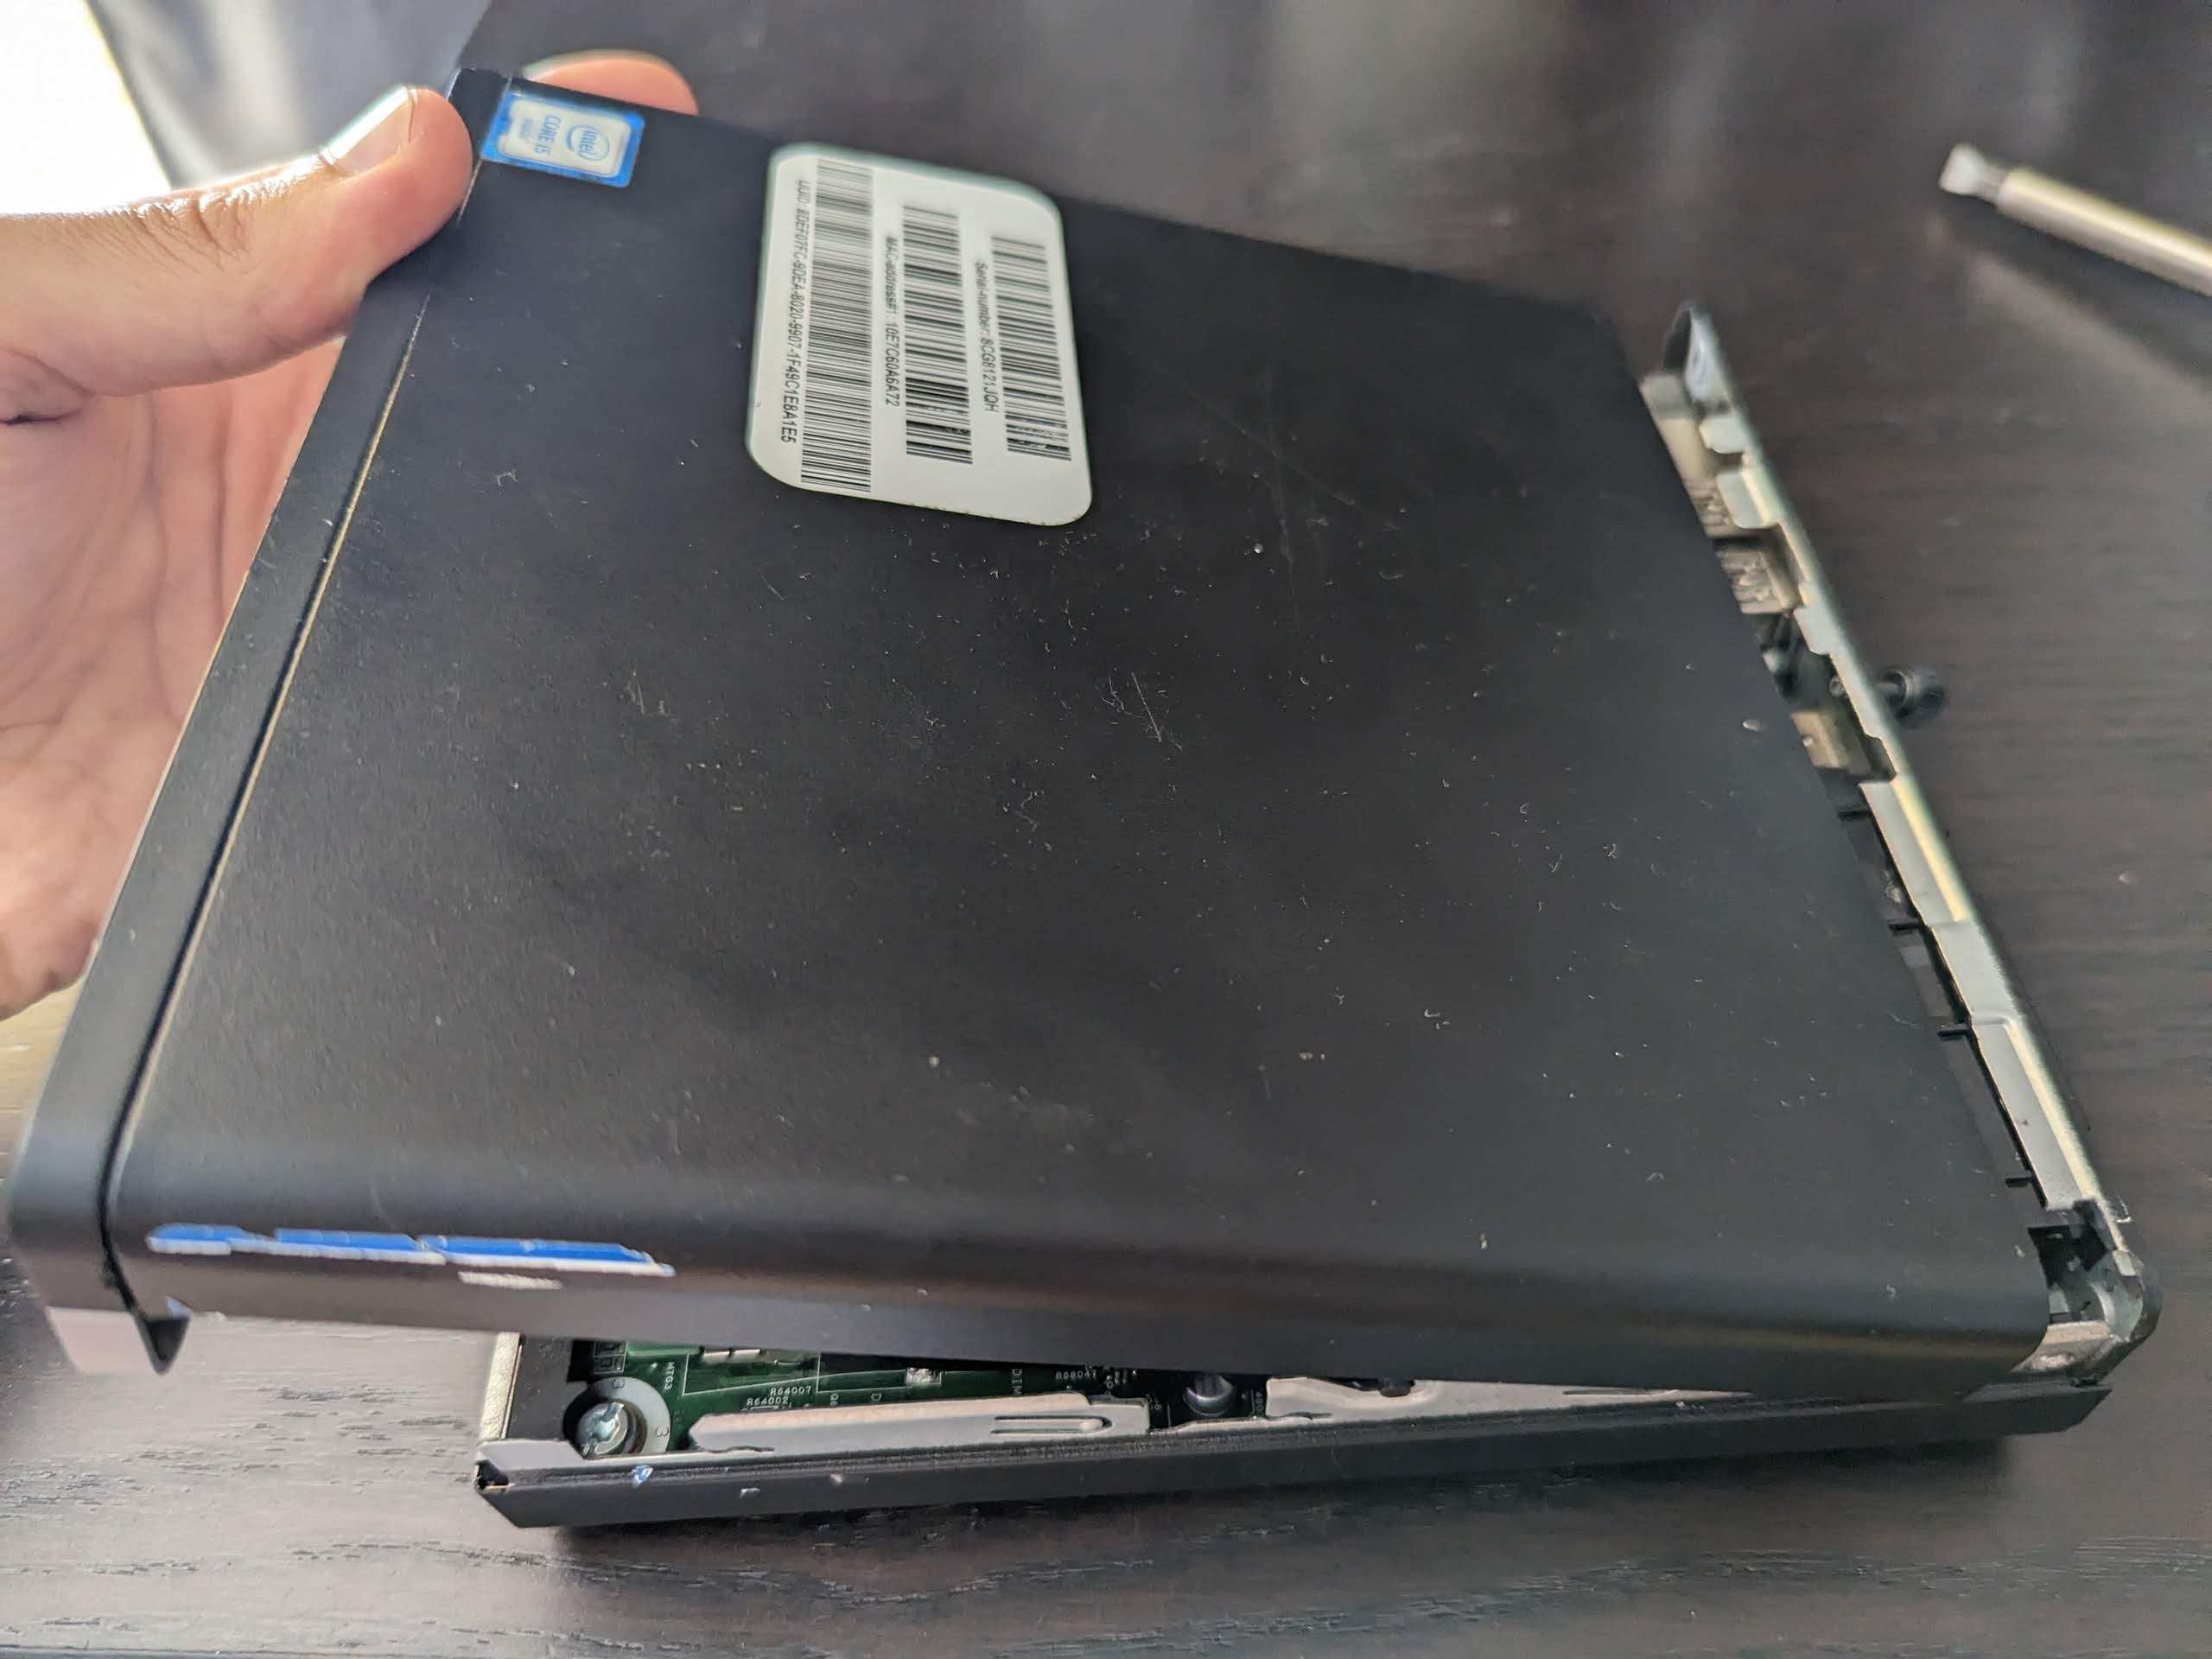
4. Fold the case up and remove
5. Unscrew 2.5" bay – bolt 1 of 3
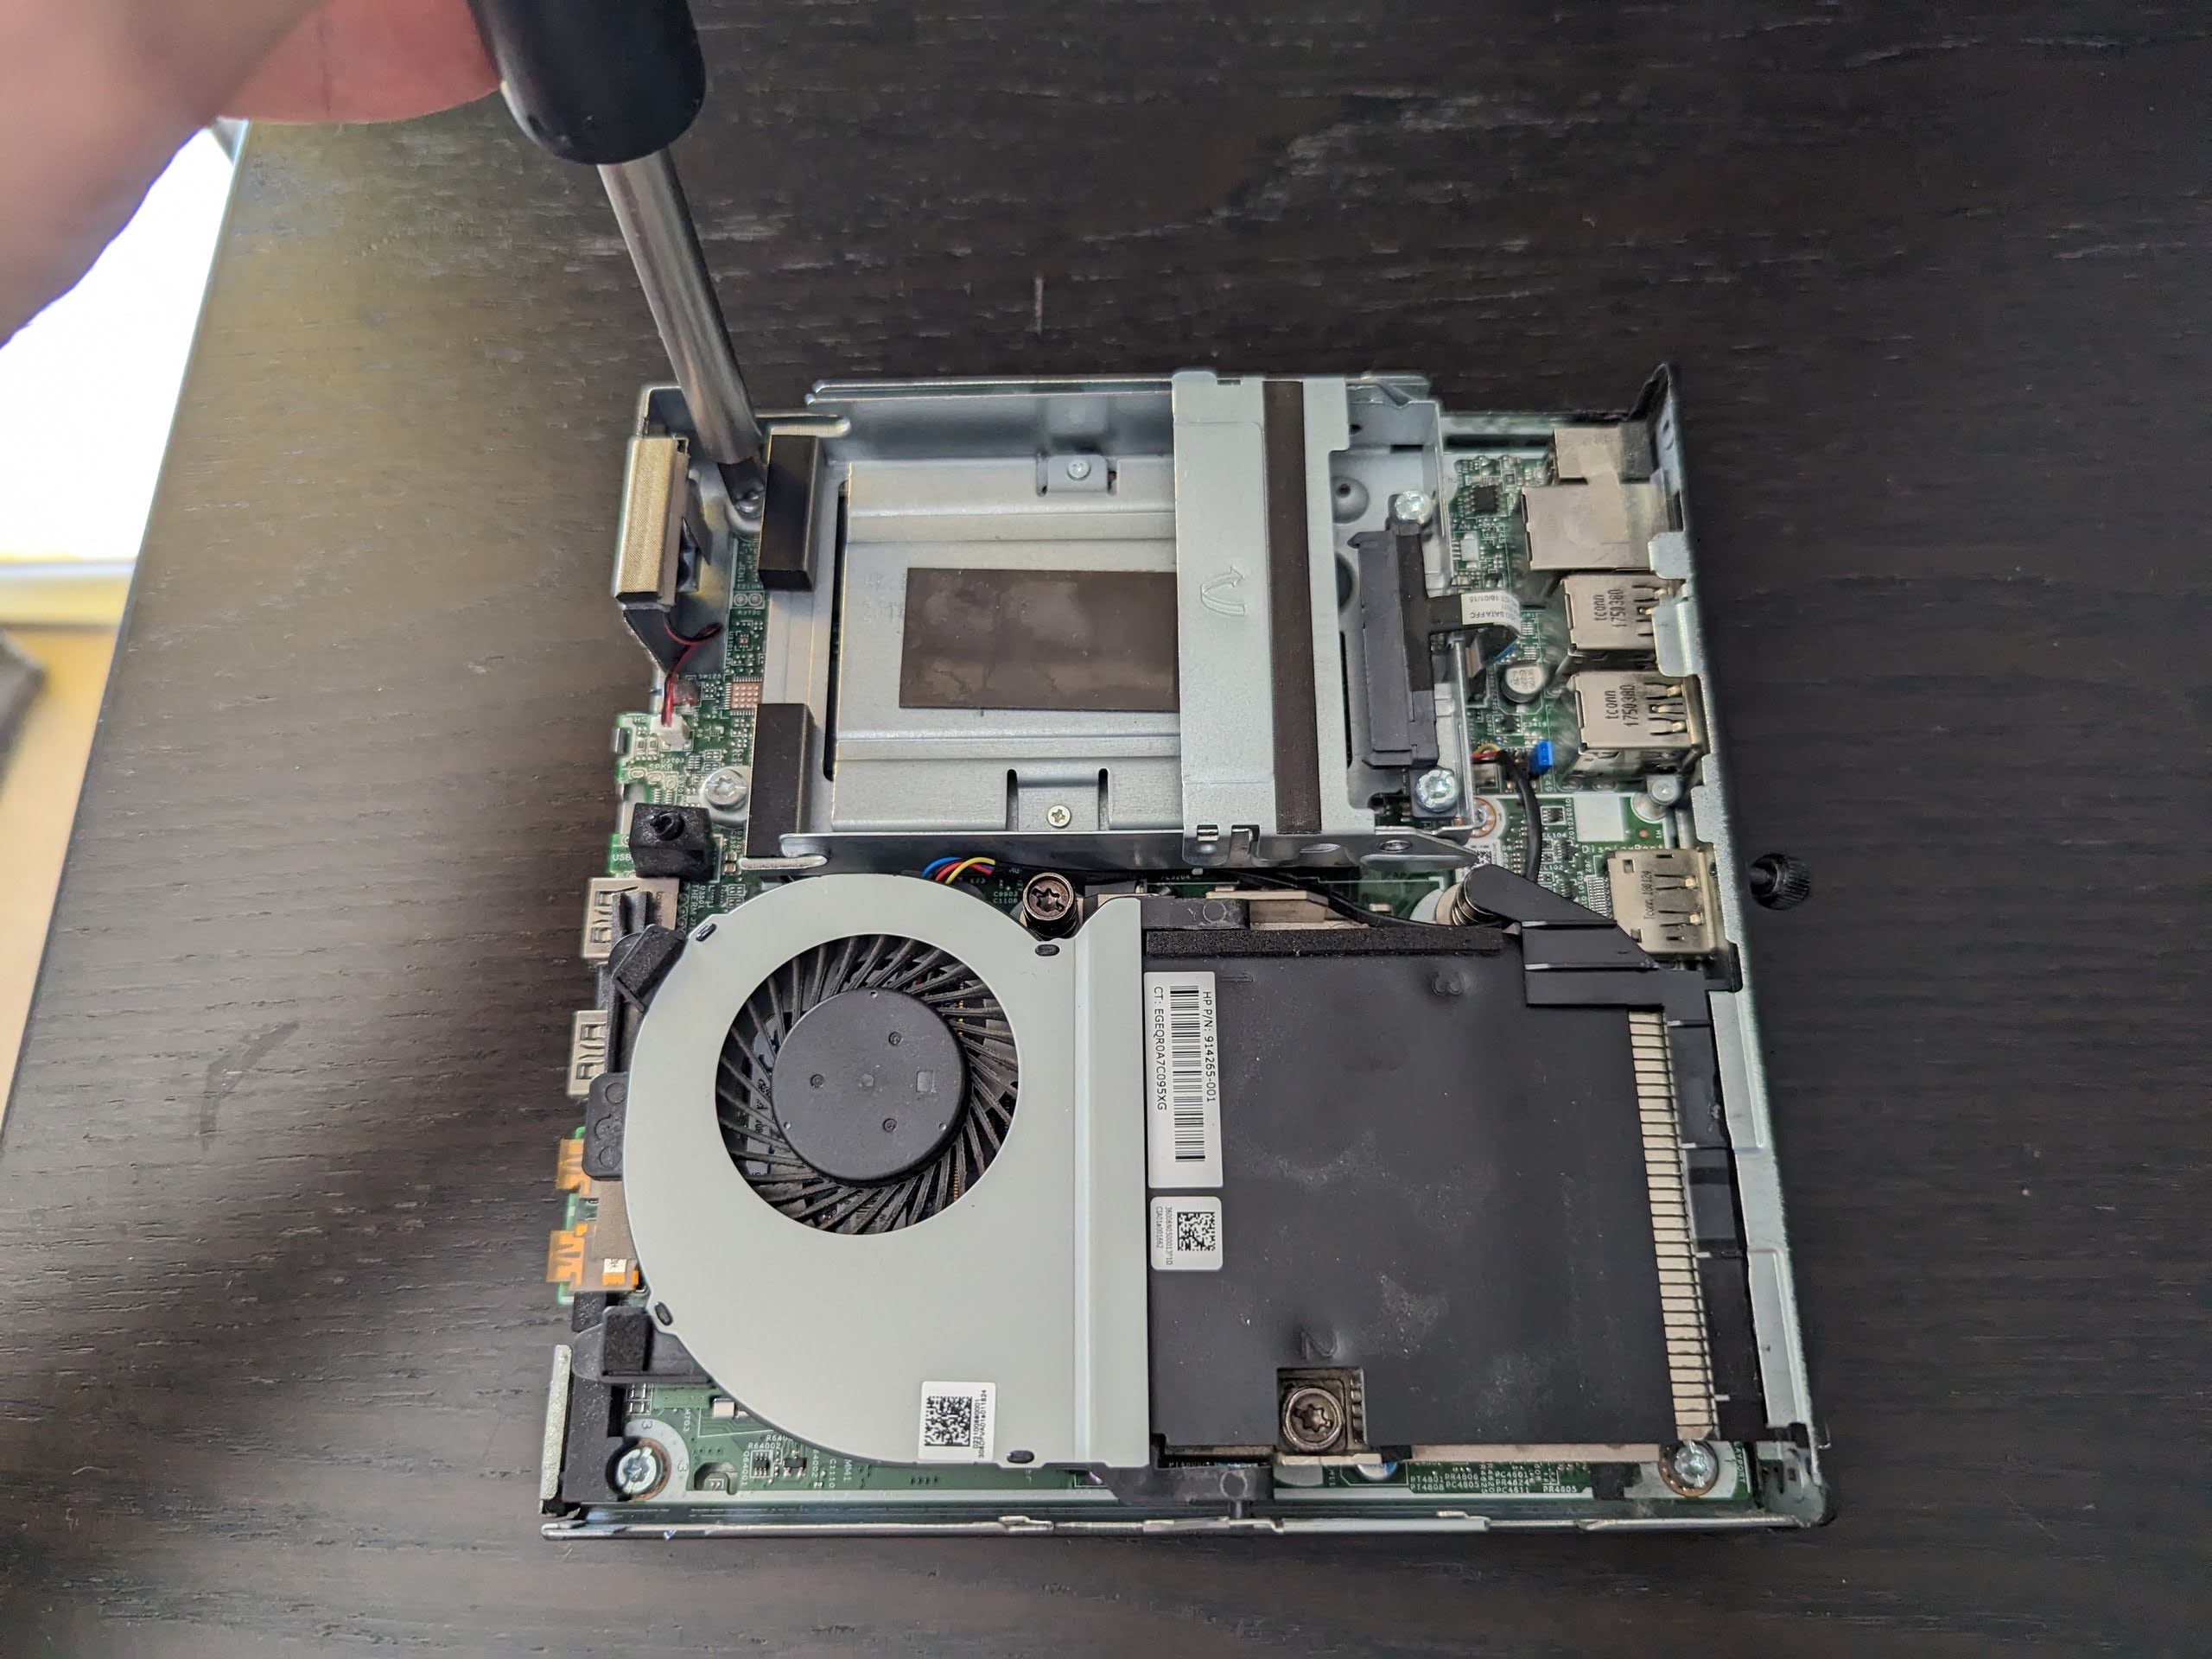
6. Unscrew 2.5" bay – bolt 2 of 3
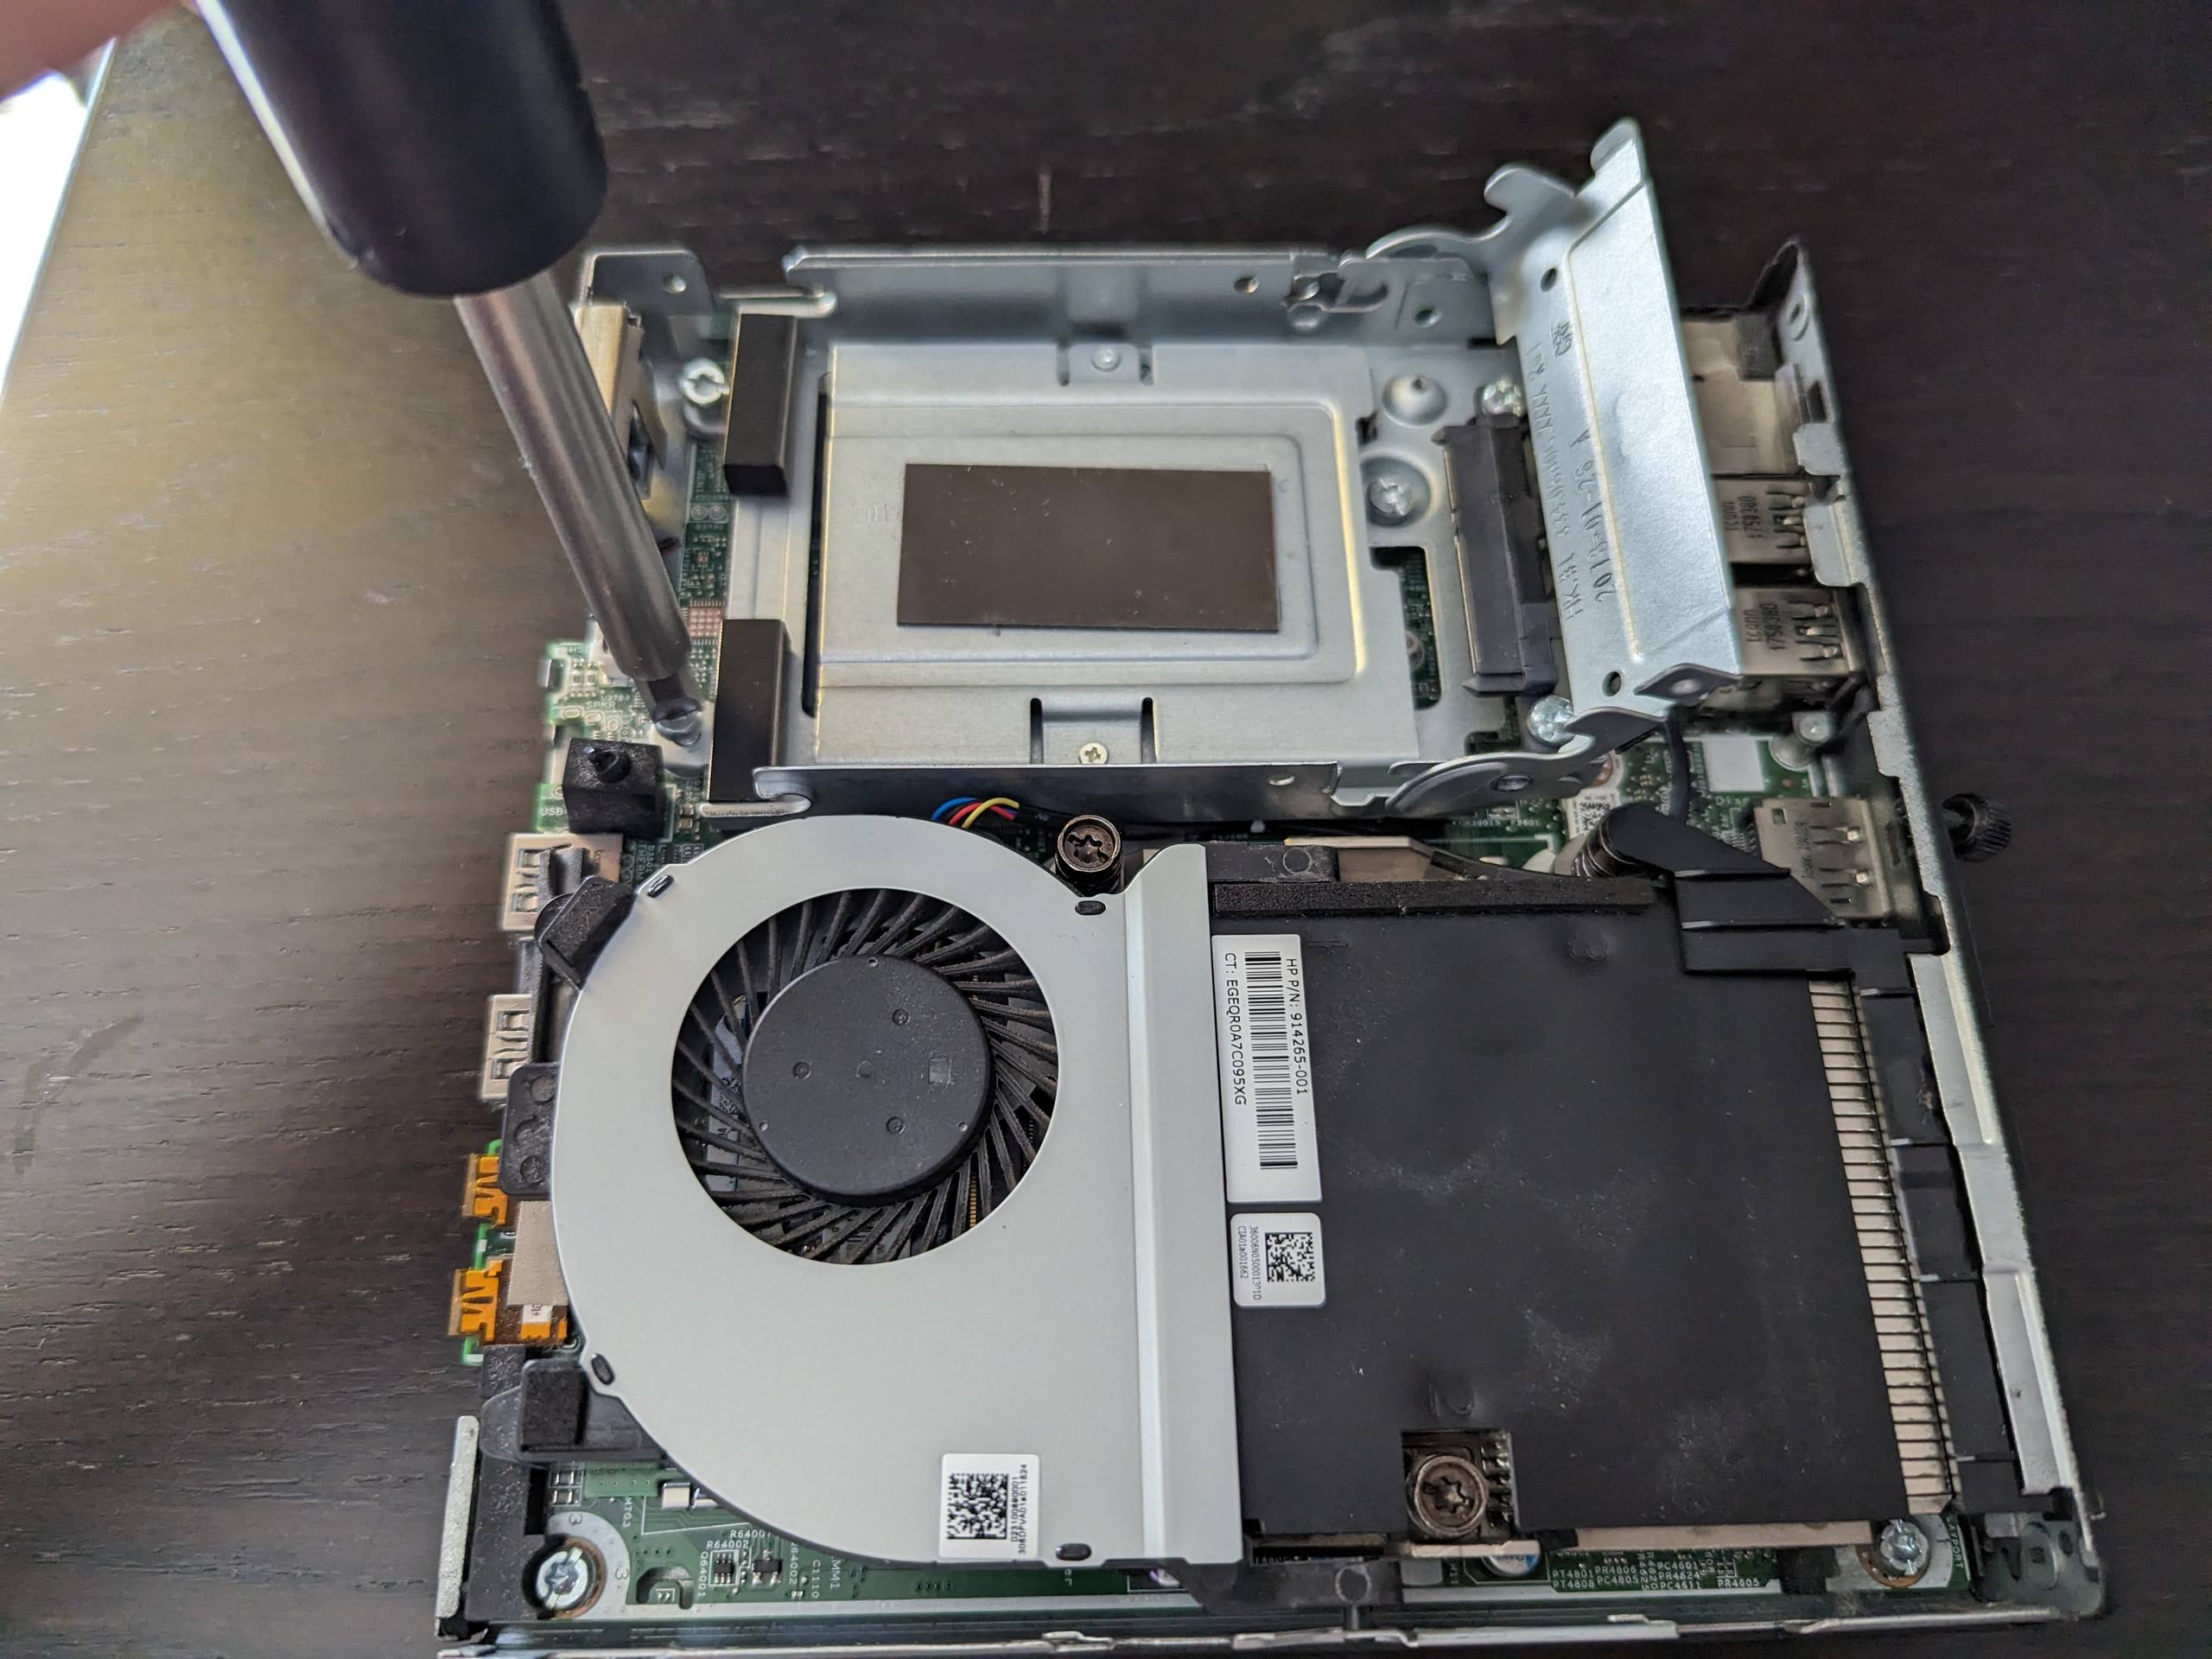
7. Unscrew 2.5" bay – bolt 3 of 3 (under folded up bit)
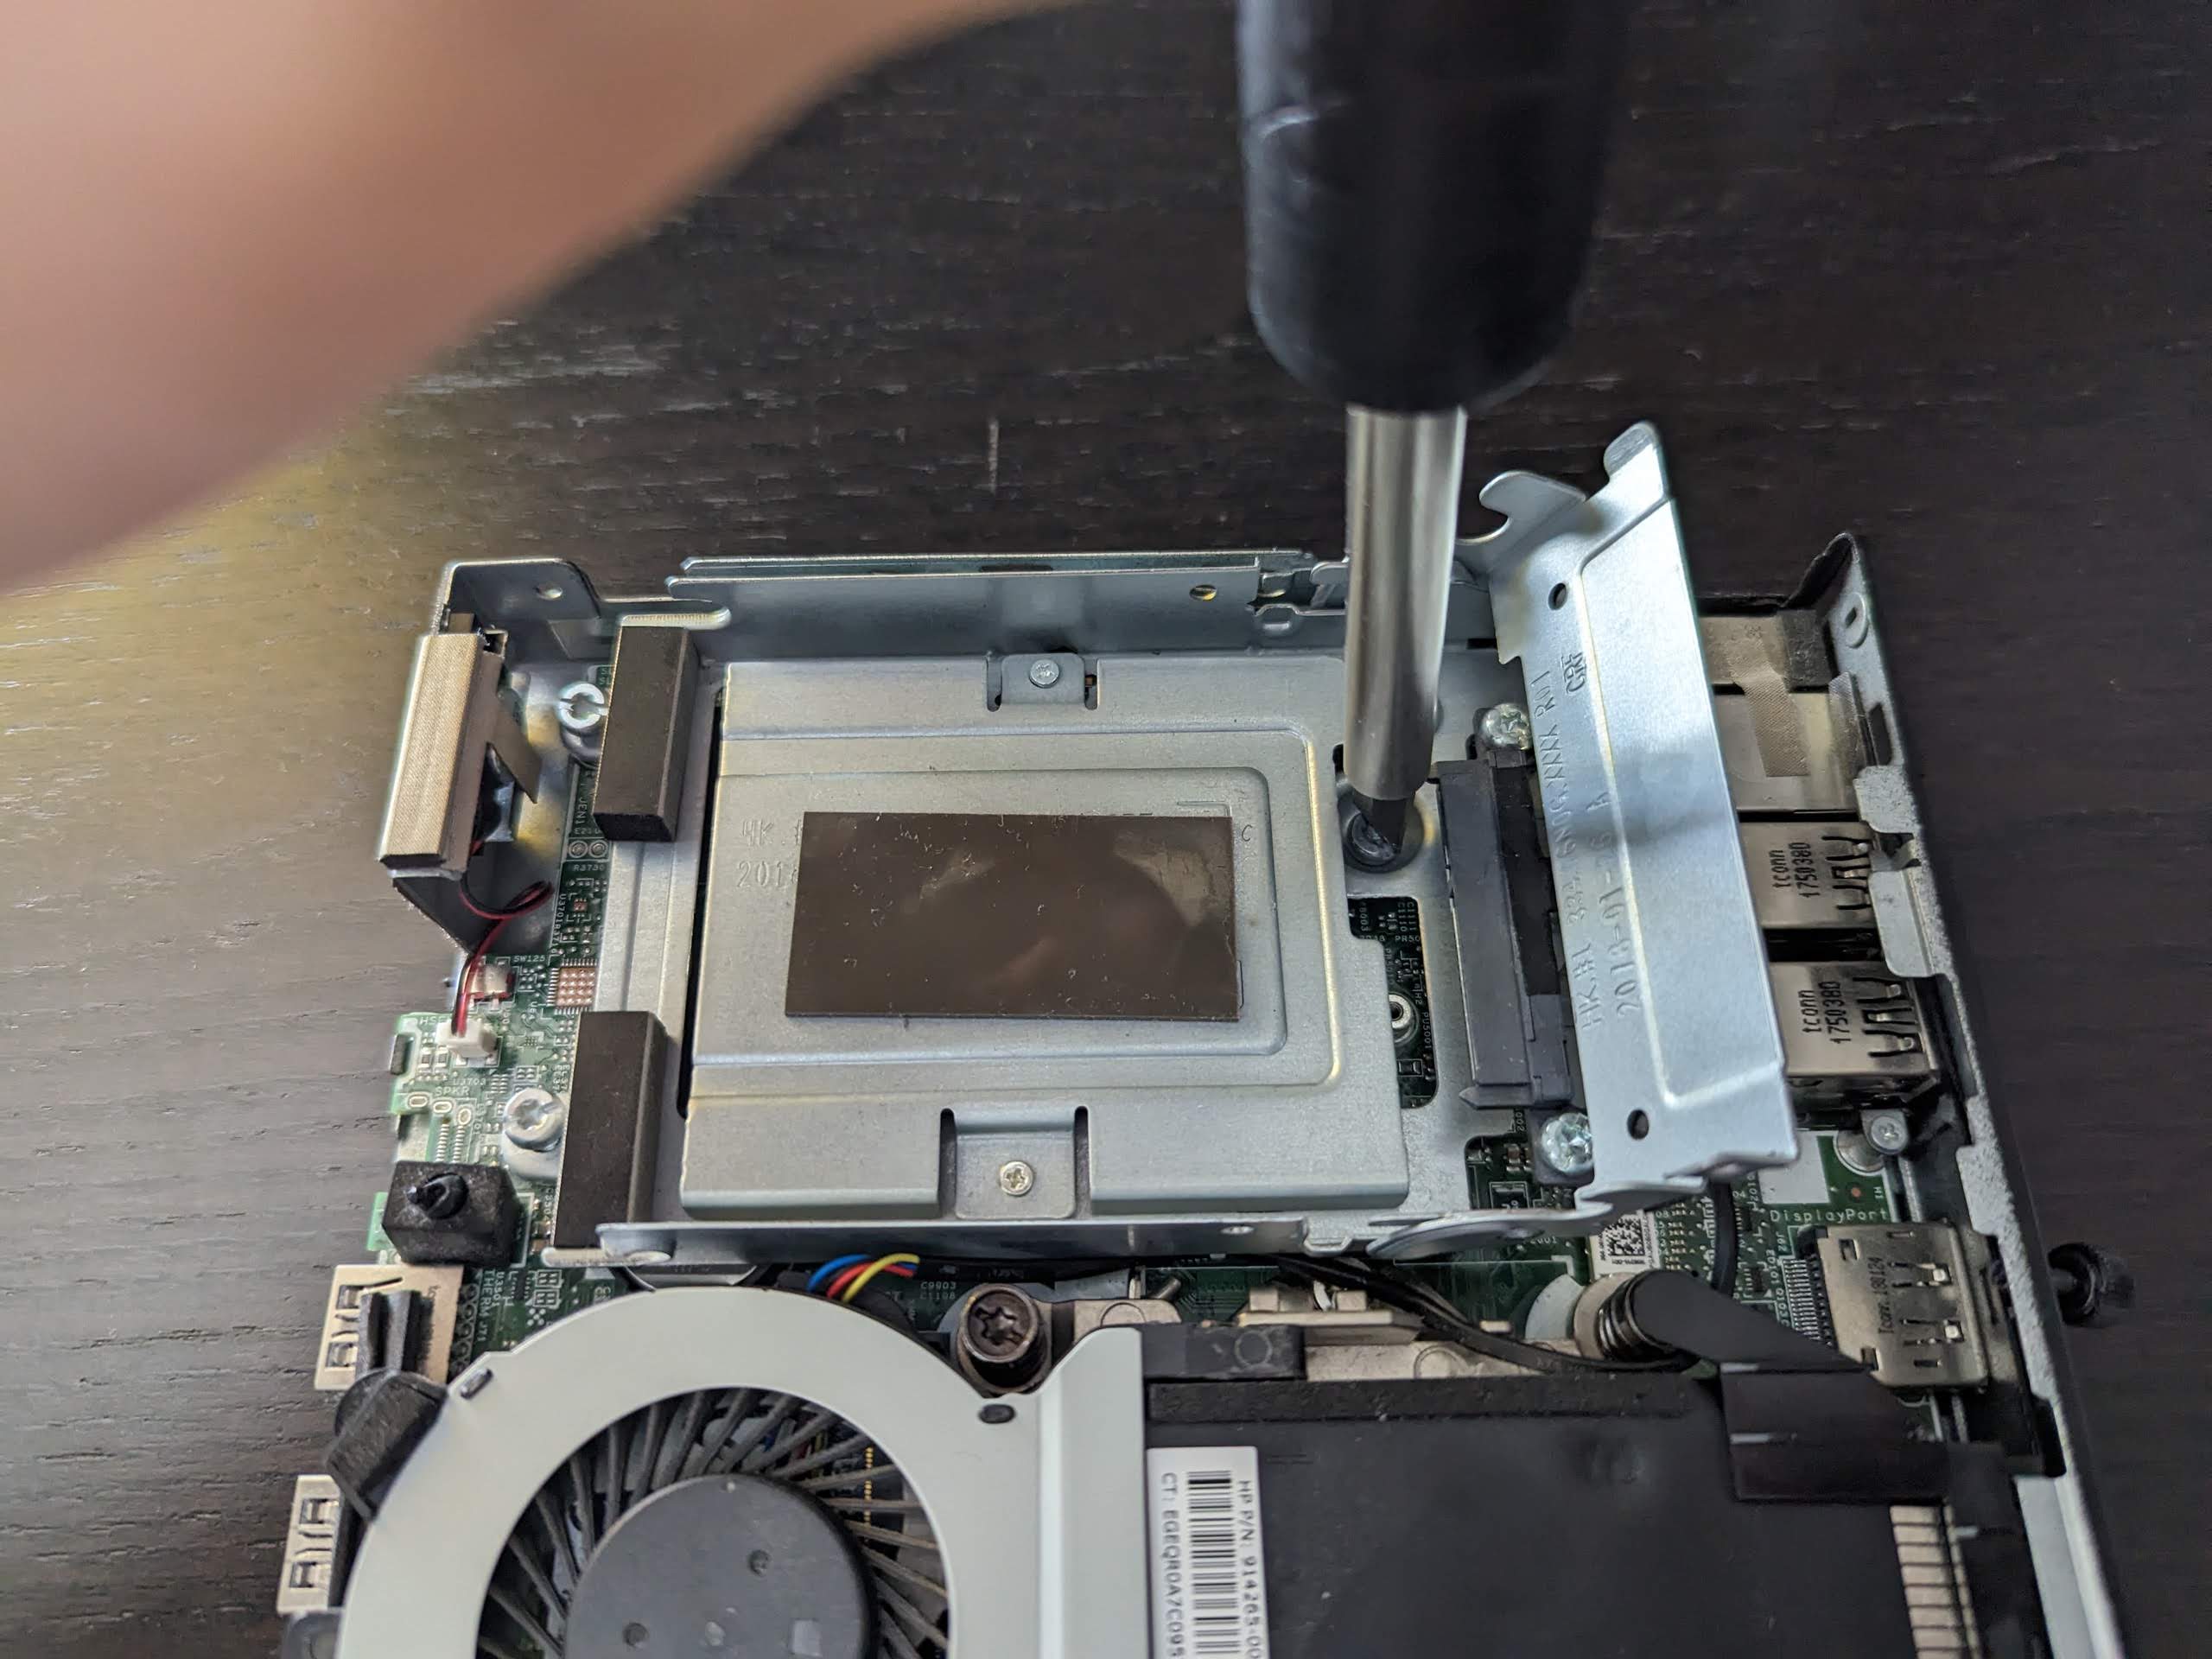
8. Fold the bay up (it's connected with a ribbon cable)
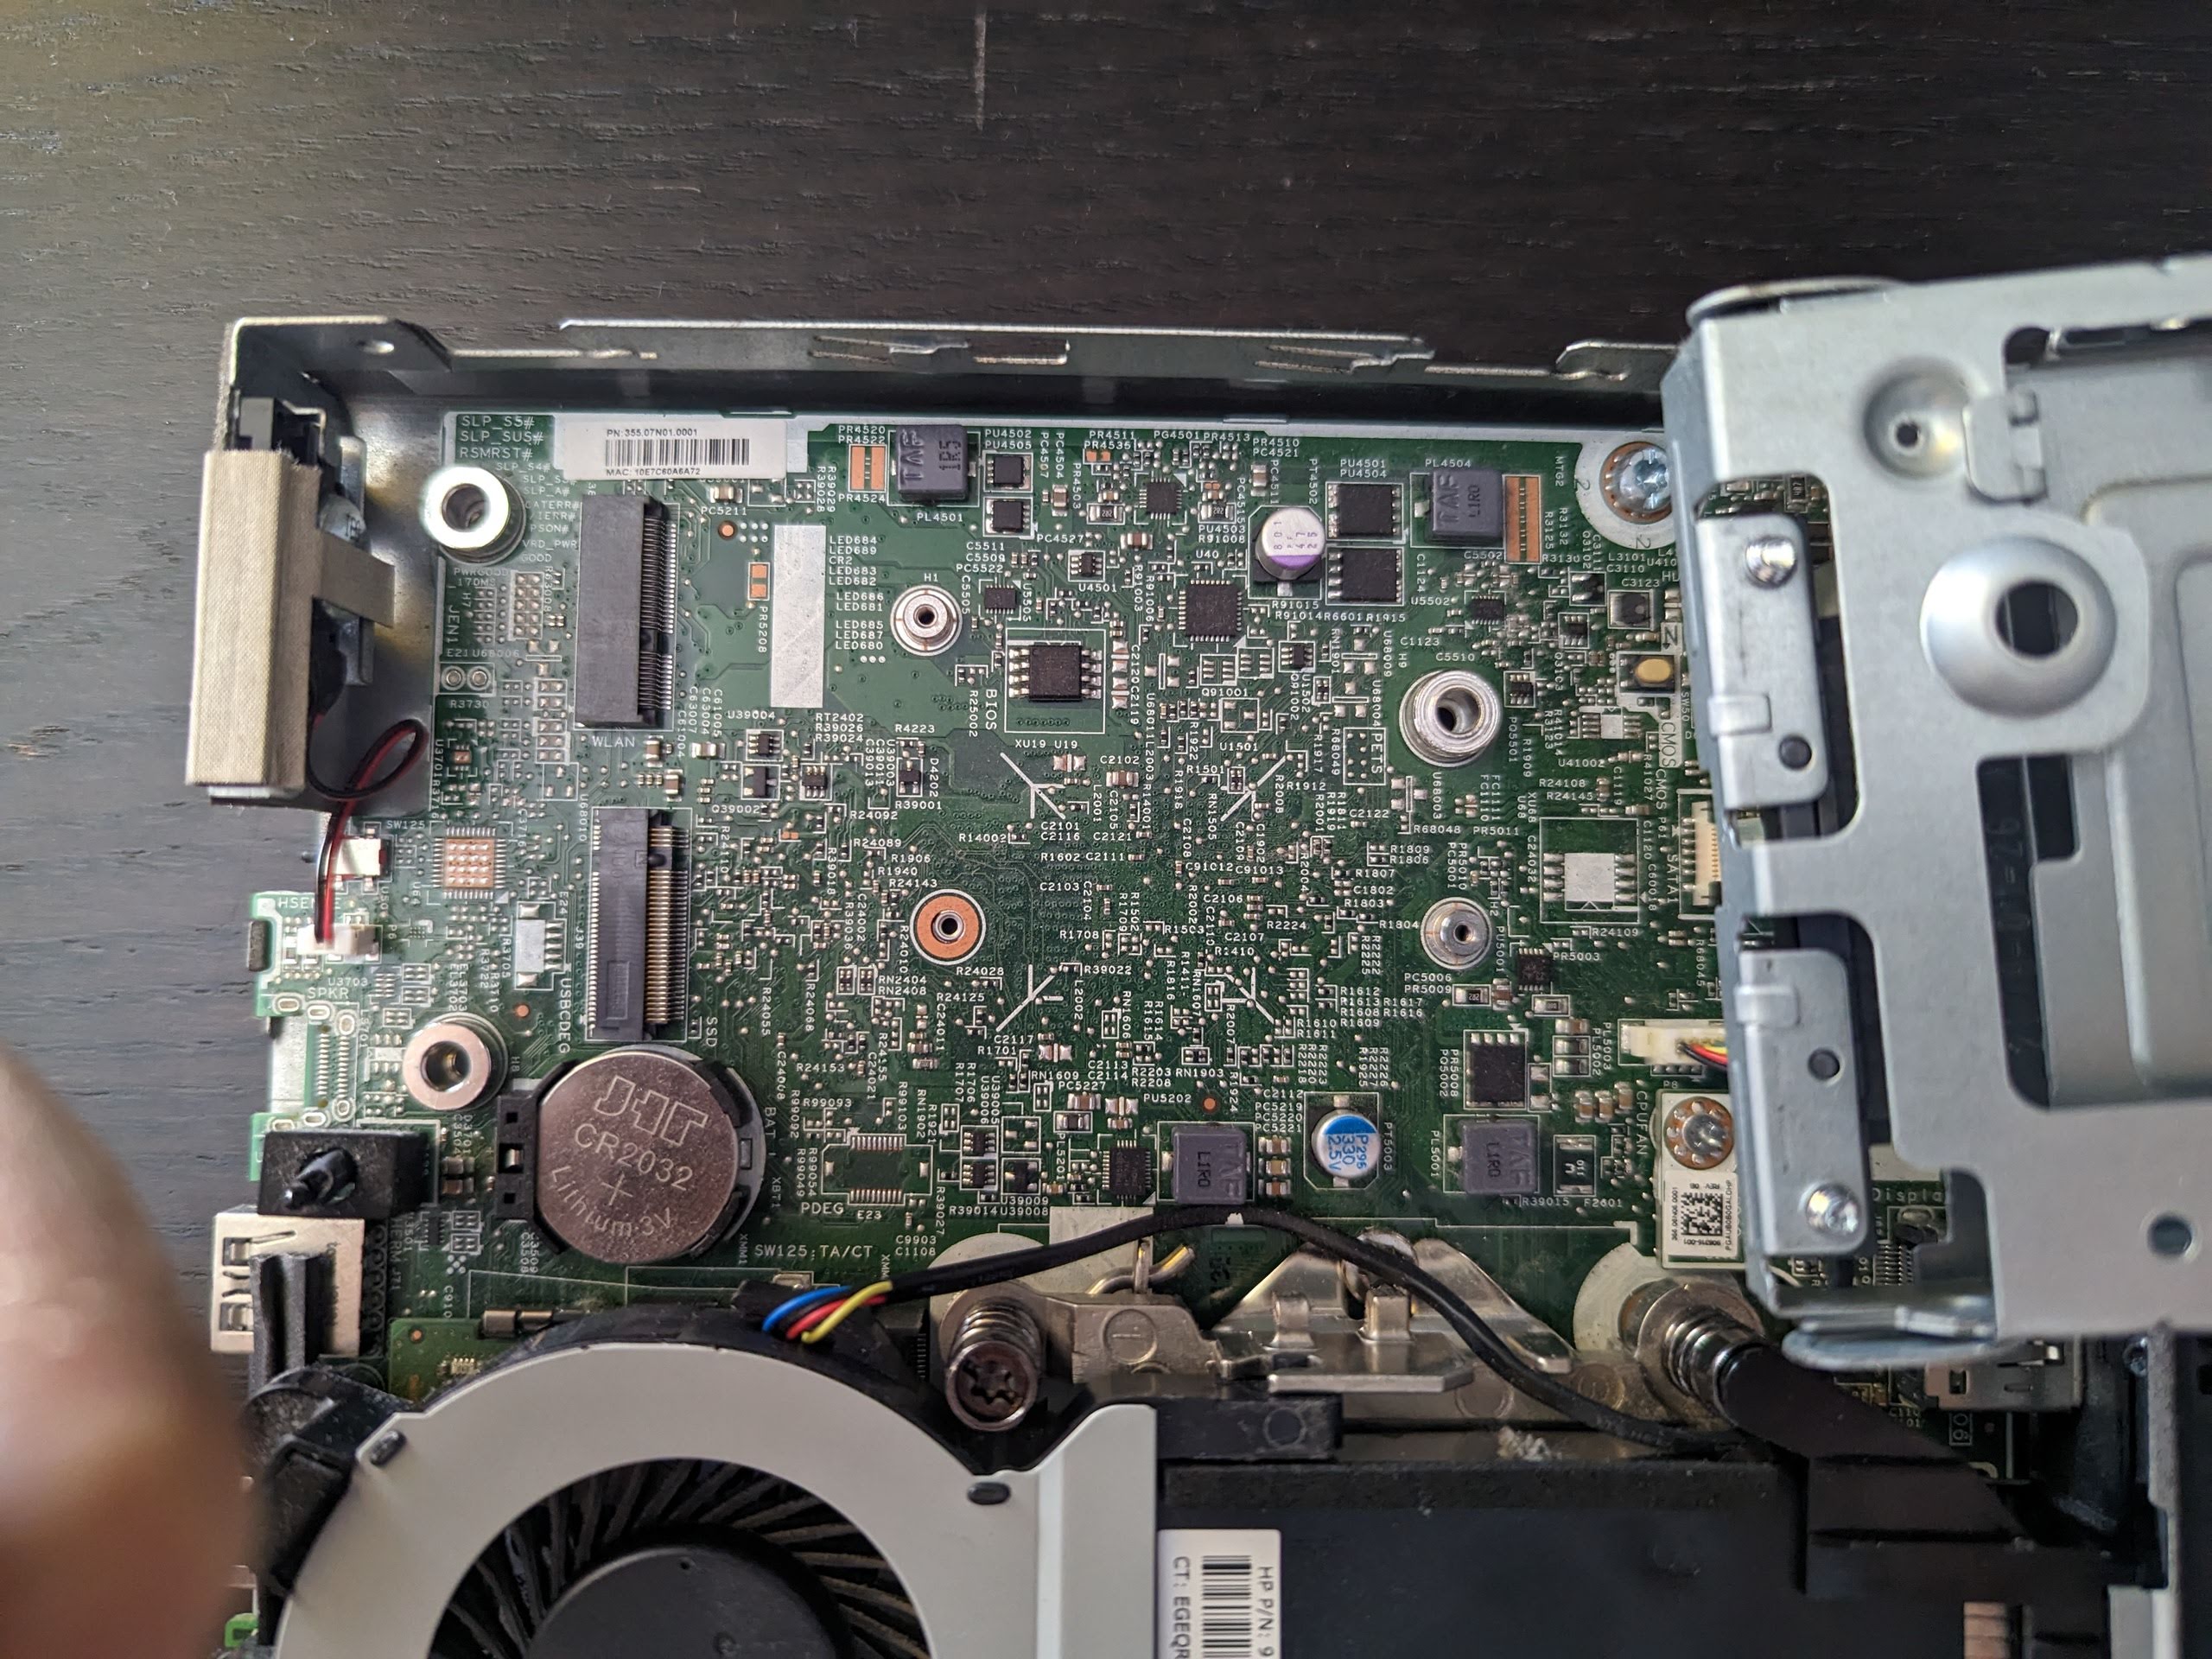
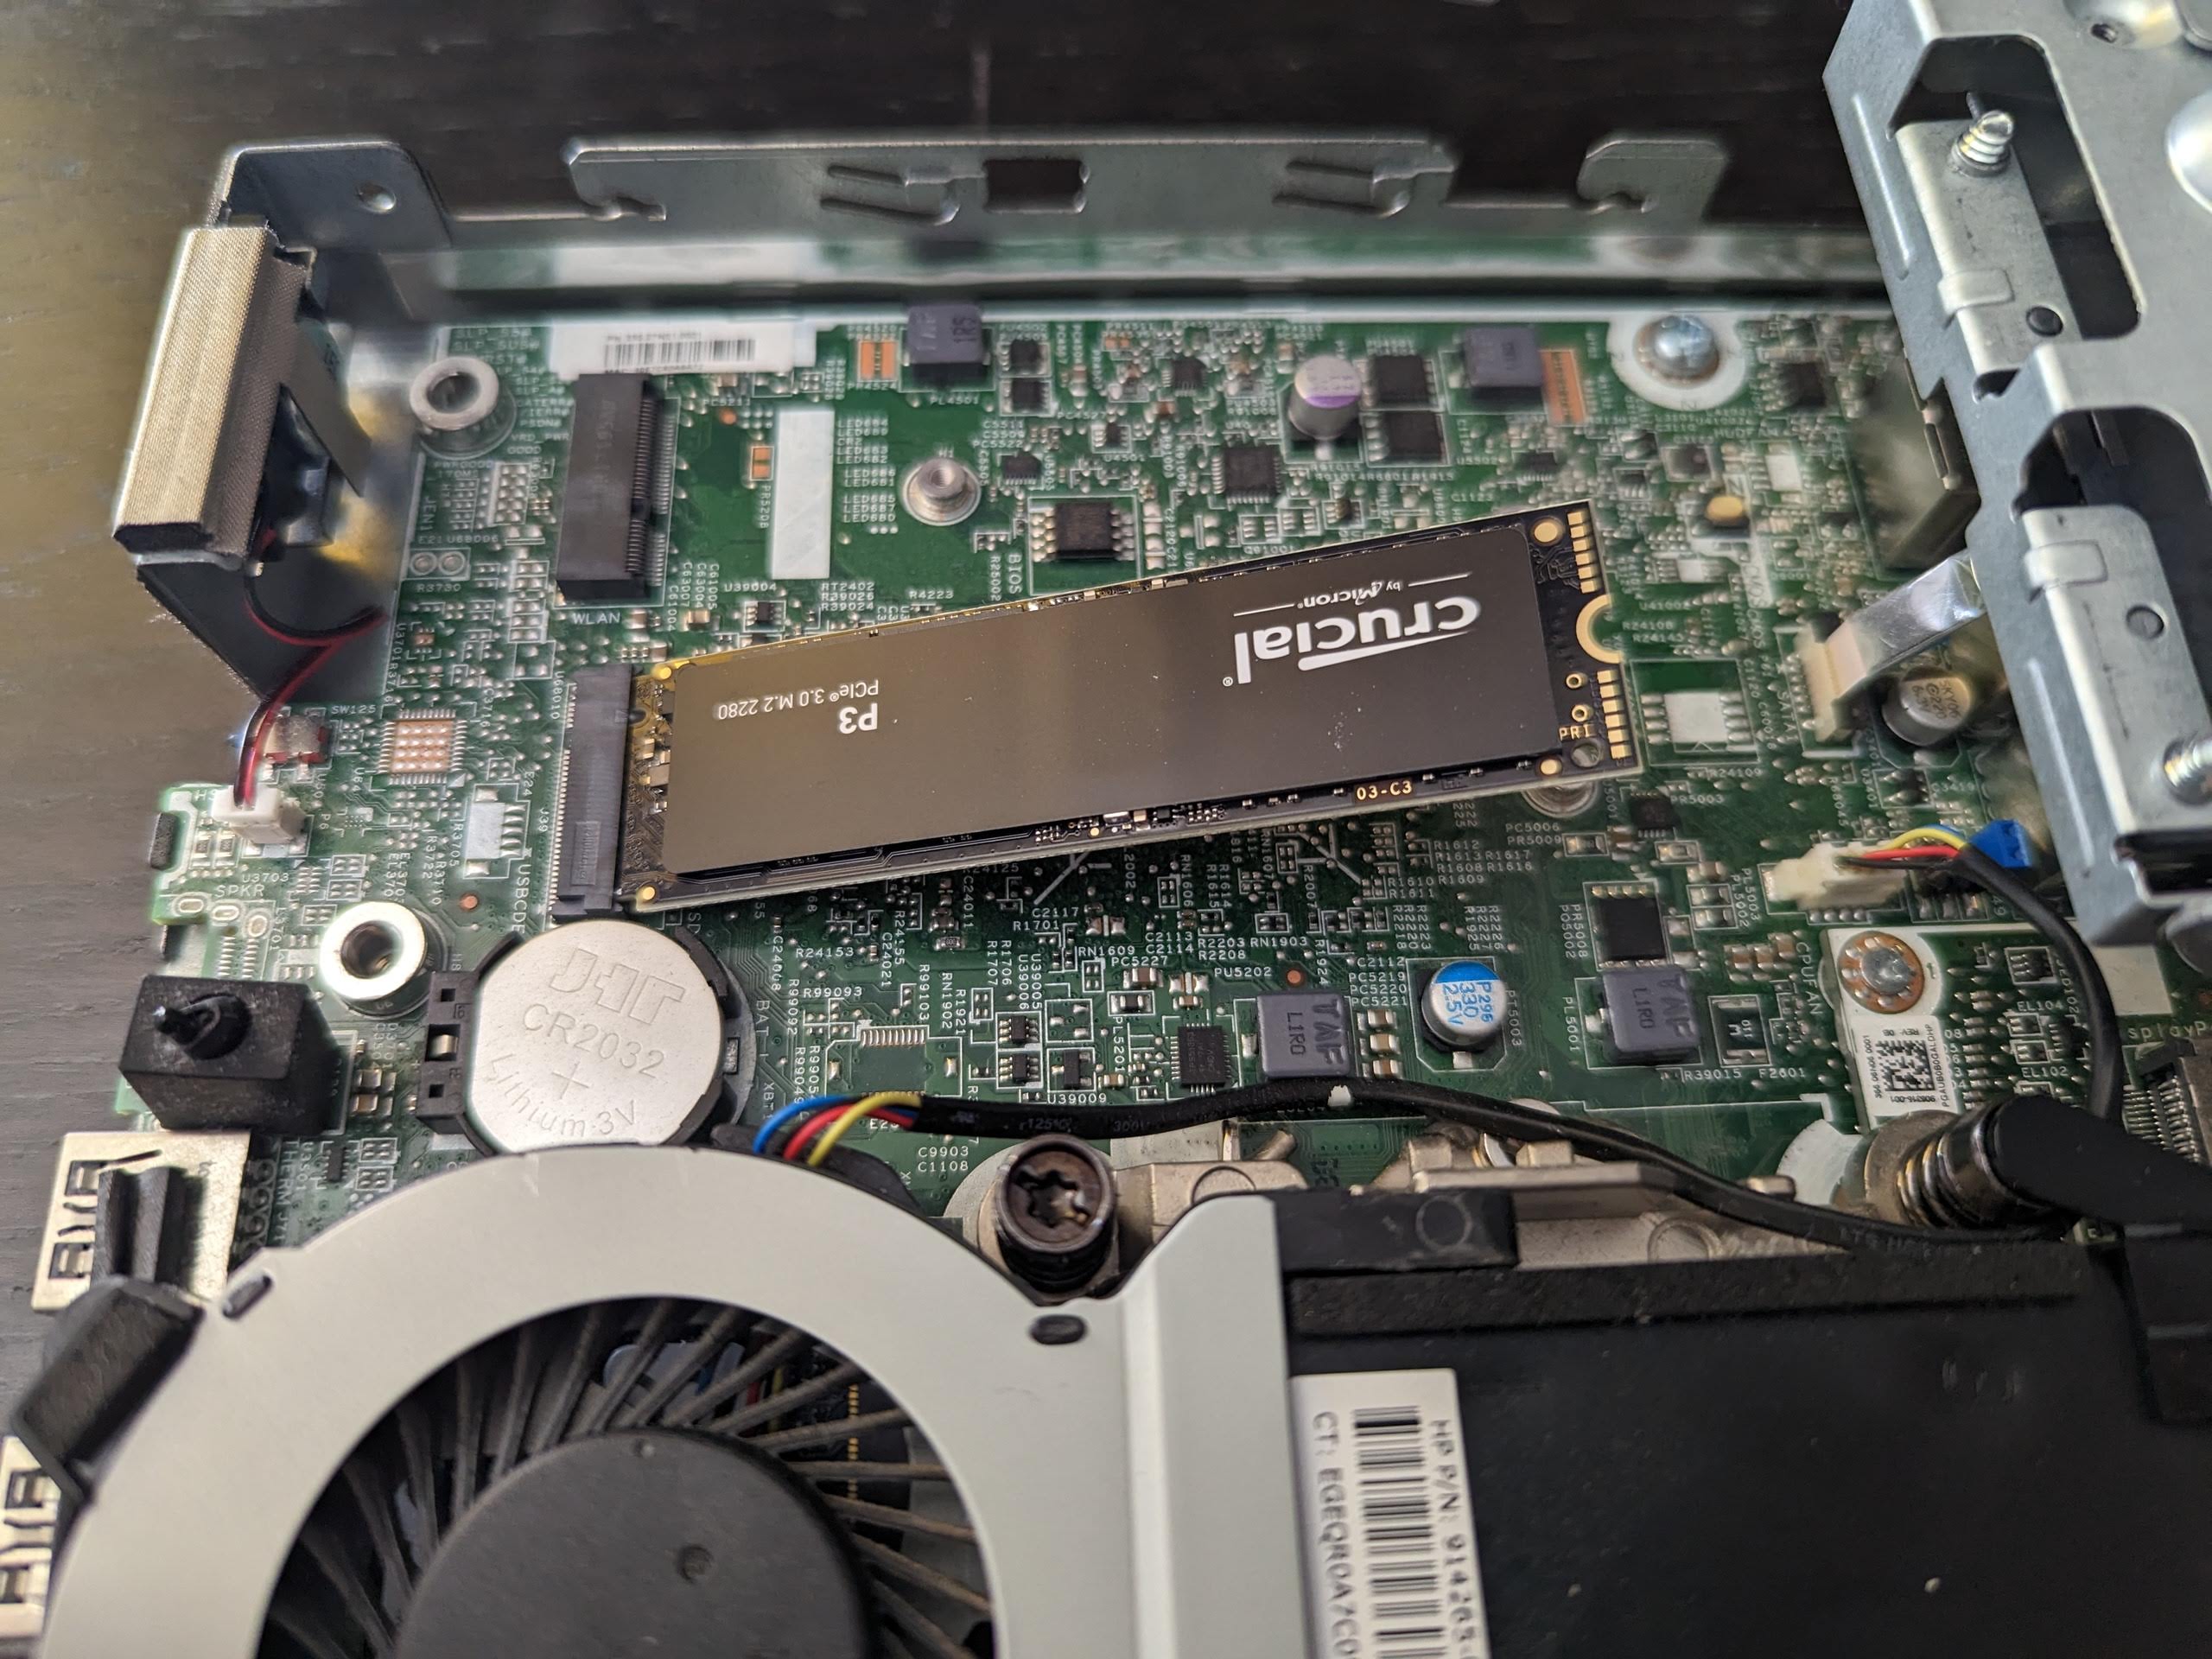
9. Slot in M.2 SSD stick (the one next to it is for expansion boards like WiFi)
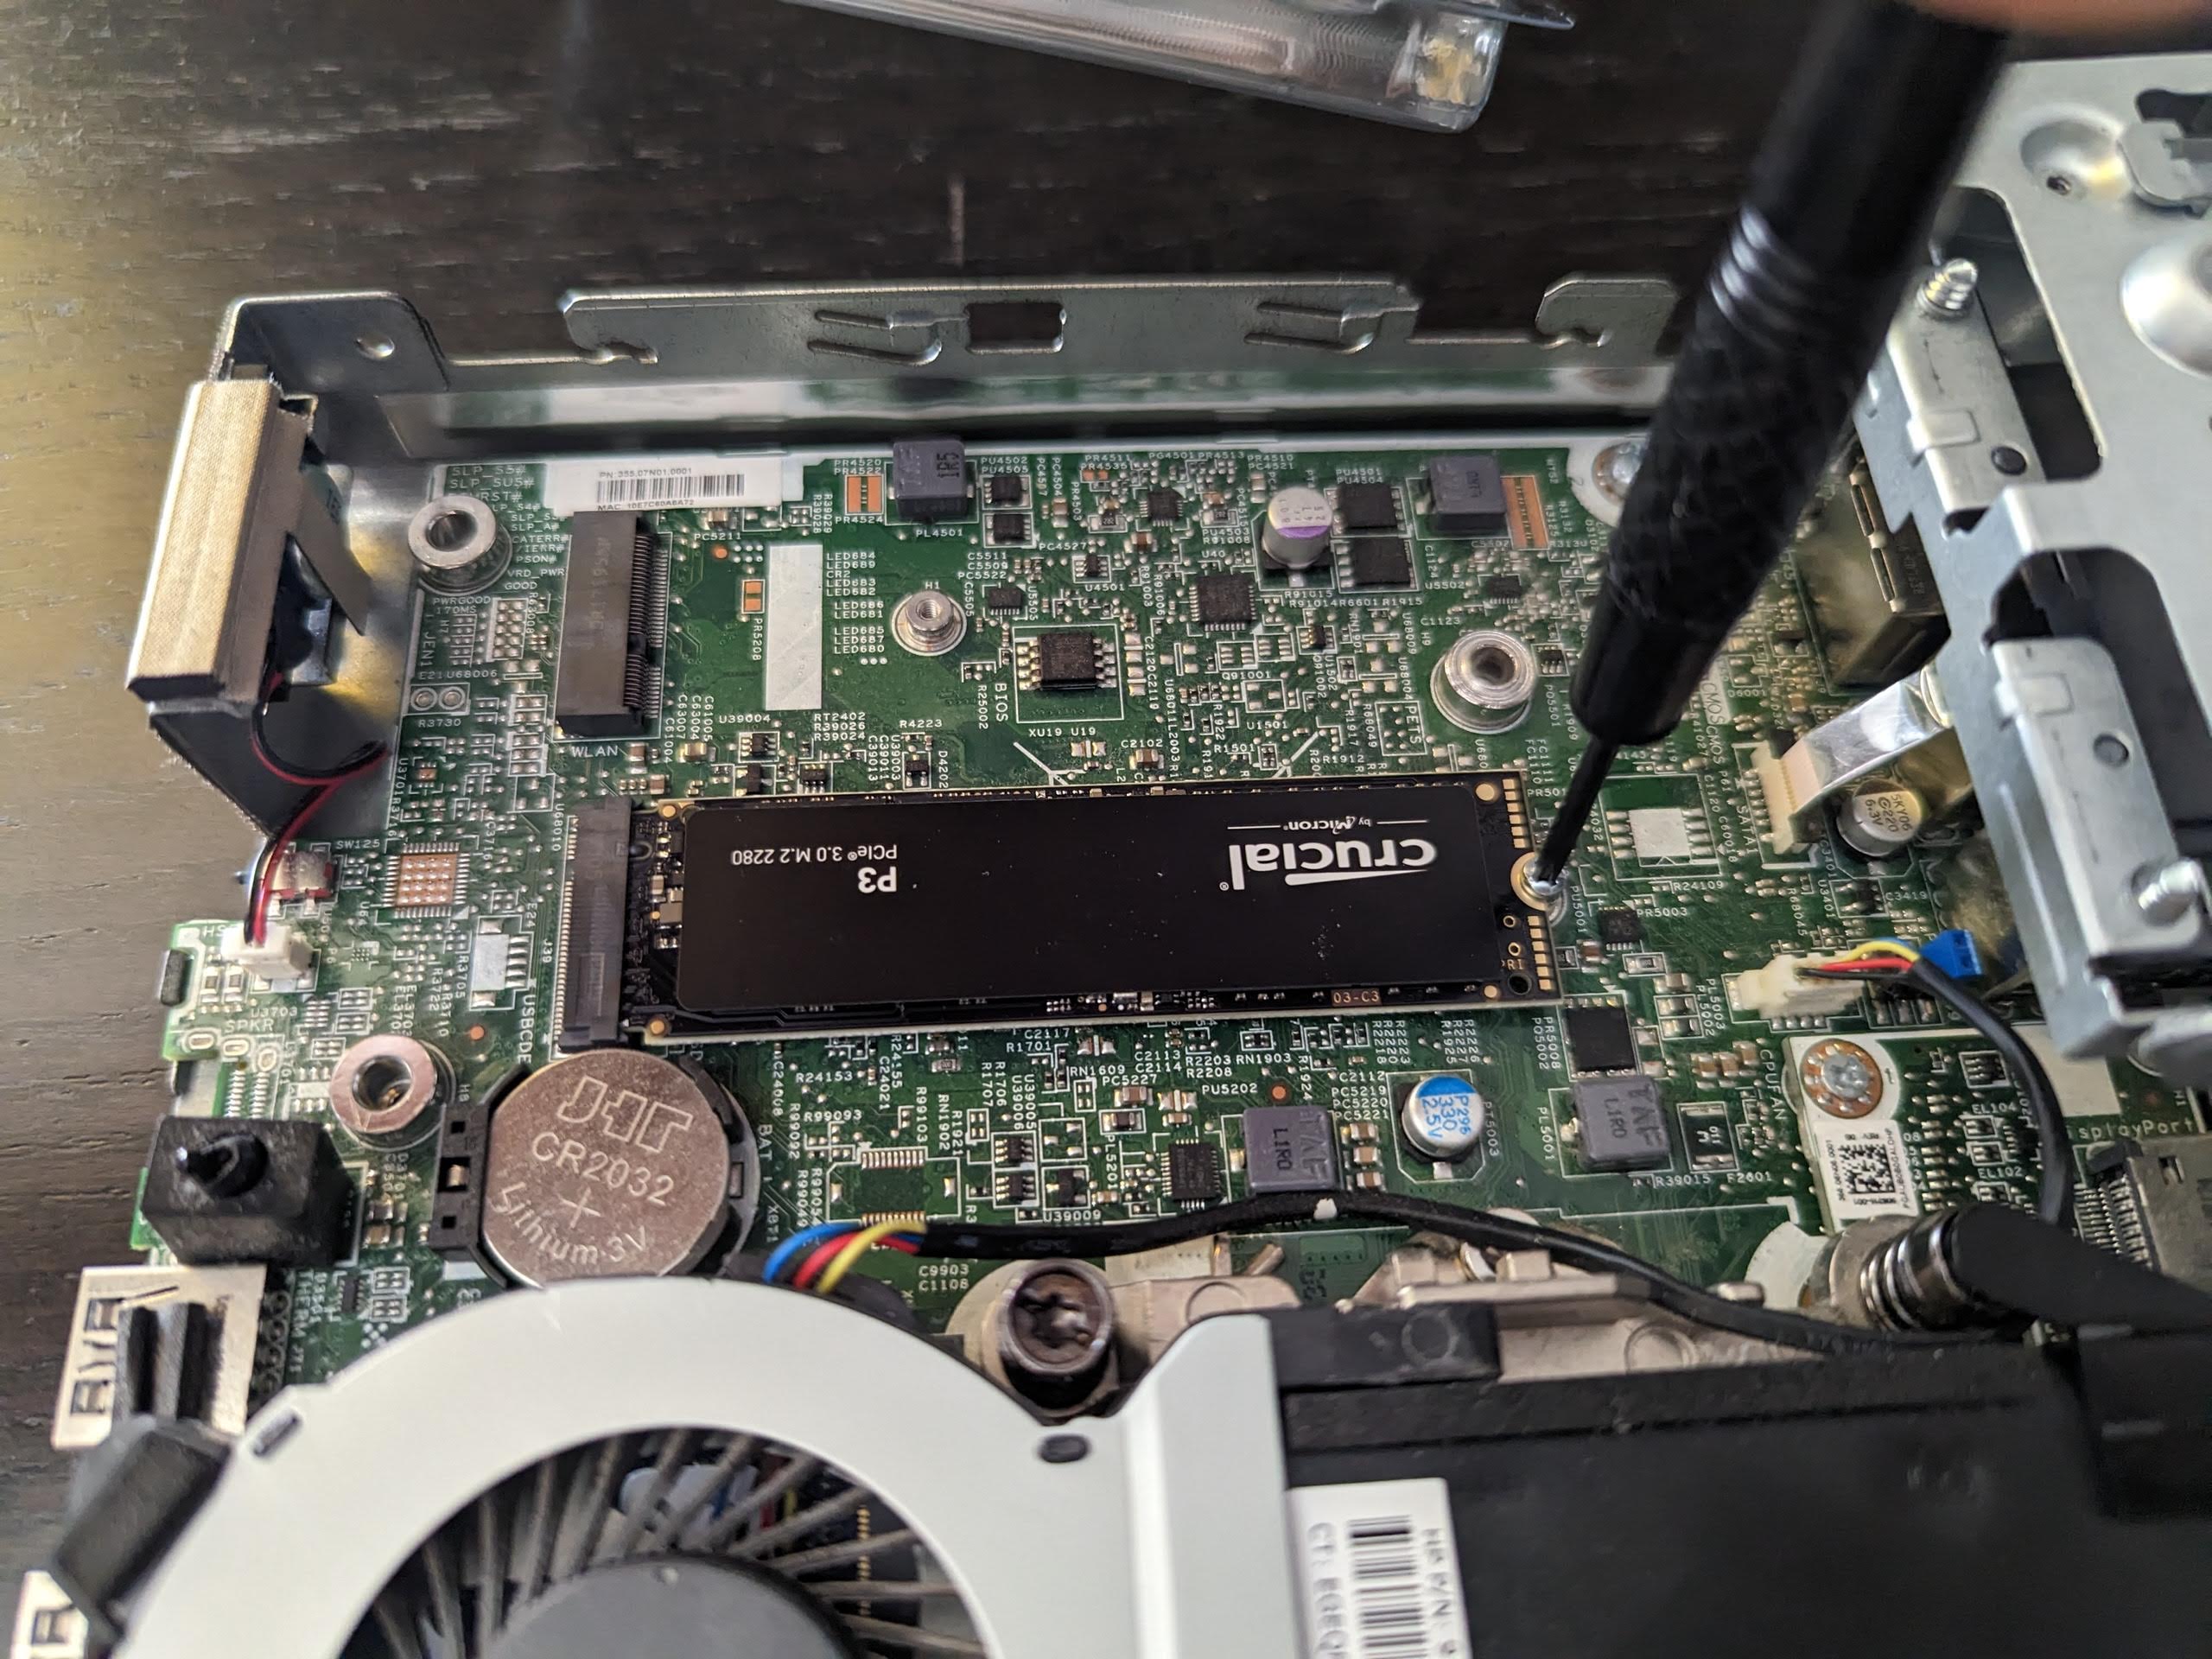
10. Screw in bolt to hold down M.2 stick
11. Do steps 2-9 in reverse order to put everything back together
☝️
Boot disk
I was a bit surprised to find out – as opposed to Synology DiskStation – the TrueNAS Scale requires a separate drive (pool) to boot from. So after installing it on the M.2 SSD, it didn't allow me to add that drive to a data pool. I was a bit annoyed at first, as I had to spelunk around in the BIOS menu (and even look up that I had to hammer Esc on startup to get into it) to change boot order to prefer USB, but it does make sense to isolate the operating system from the storage to make it less risky to update and easier to modify pools.
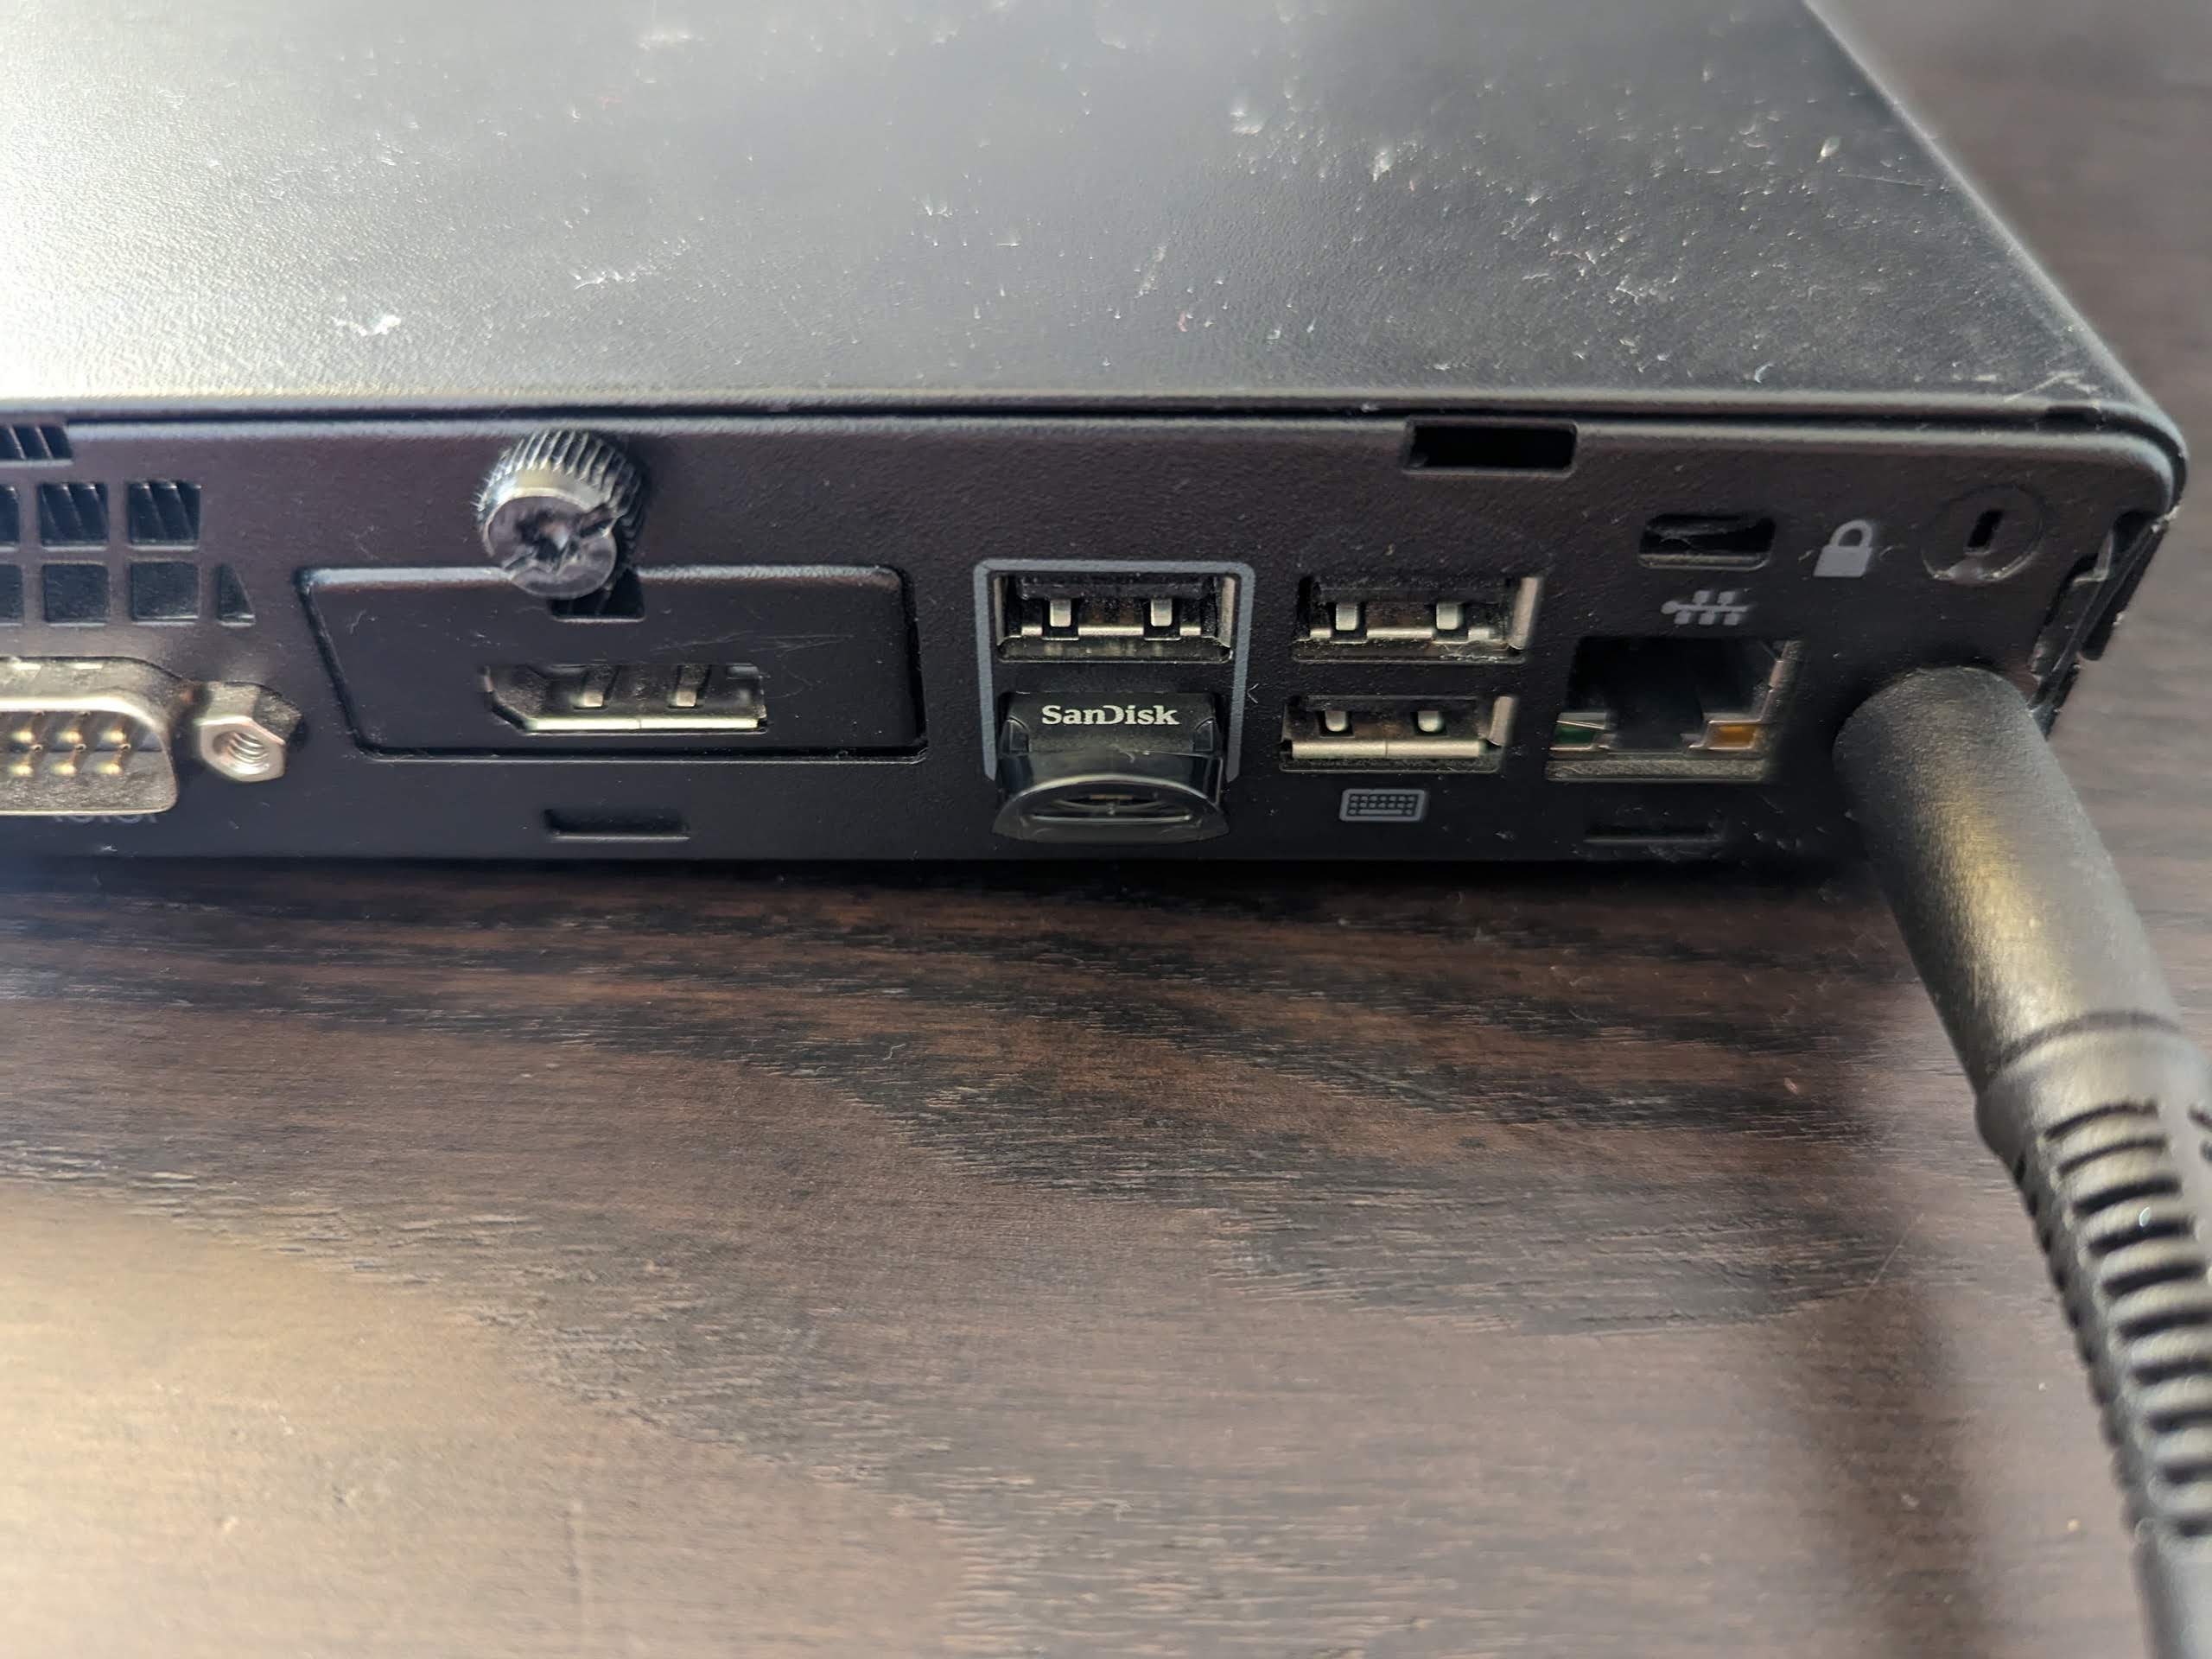
Anyway, with only 2 internal bays, I didn't want to sacrifice the remaining 2.5" SATA for this (as almost surely we'll need more space in a year or two for storing lossless videos for editing) so ended up getting a £9 SanDisk 32GB Ultra Fit USB 3.1 Flash Drive by using my morning run to literally run and pick one up from a Curry's a couple kilometres away as I wanted to get the build done and start copying files in the same weekend 😅 Edit: see note at the bottom of the post, this drive died and SSD drives are much cheaper now, so definitely don't buy a flash drive any more!
You can also buy USB sticks that have a proper SSD inside (see a few in this article), but I preferred getting this "Fit" type drive as it's tiny and has no chance of accidentally being knocked out.
WARNING: it's important to mention that flash drives have a limited number of write cycles and generally not recommended as a boot drive to run an operating system off. After a bit of research I decided to take the risk, but you should do your own reading and make your mind up if you're happy with it. I'll mention some drive wear mitigating strategies in the next blog post about installing and configuring TrueNAS Scale.
Anyway, the hardware is now ready to install TrueNAS Scale (or any other NAS system you want)!
Read my follow-up blog post Installing and configuring TrueNAS Scale for home use.
2025-01-14 update: well, I got ~18 months of service out of the tiny Sandisk, yesterday it declared itself read only 🙀
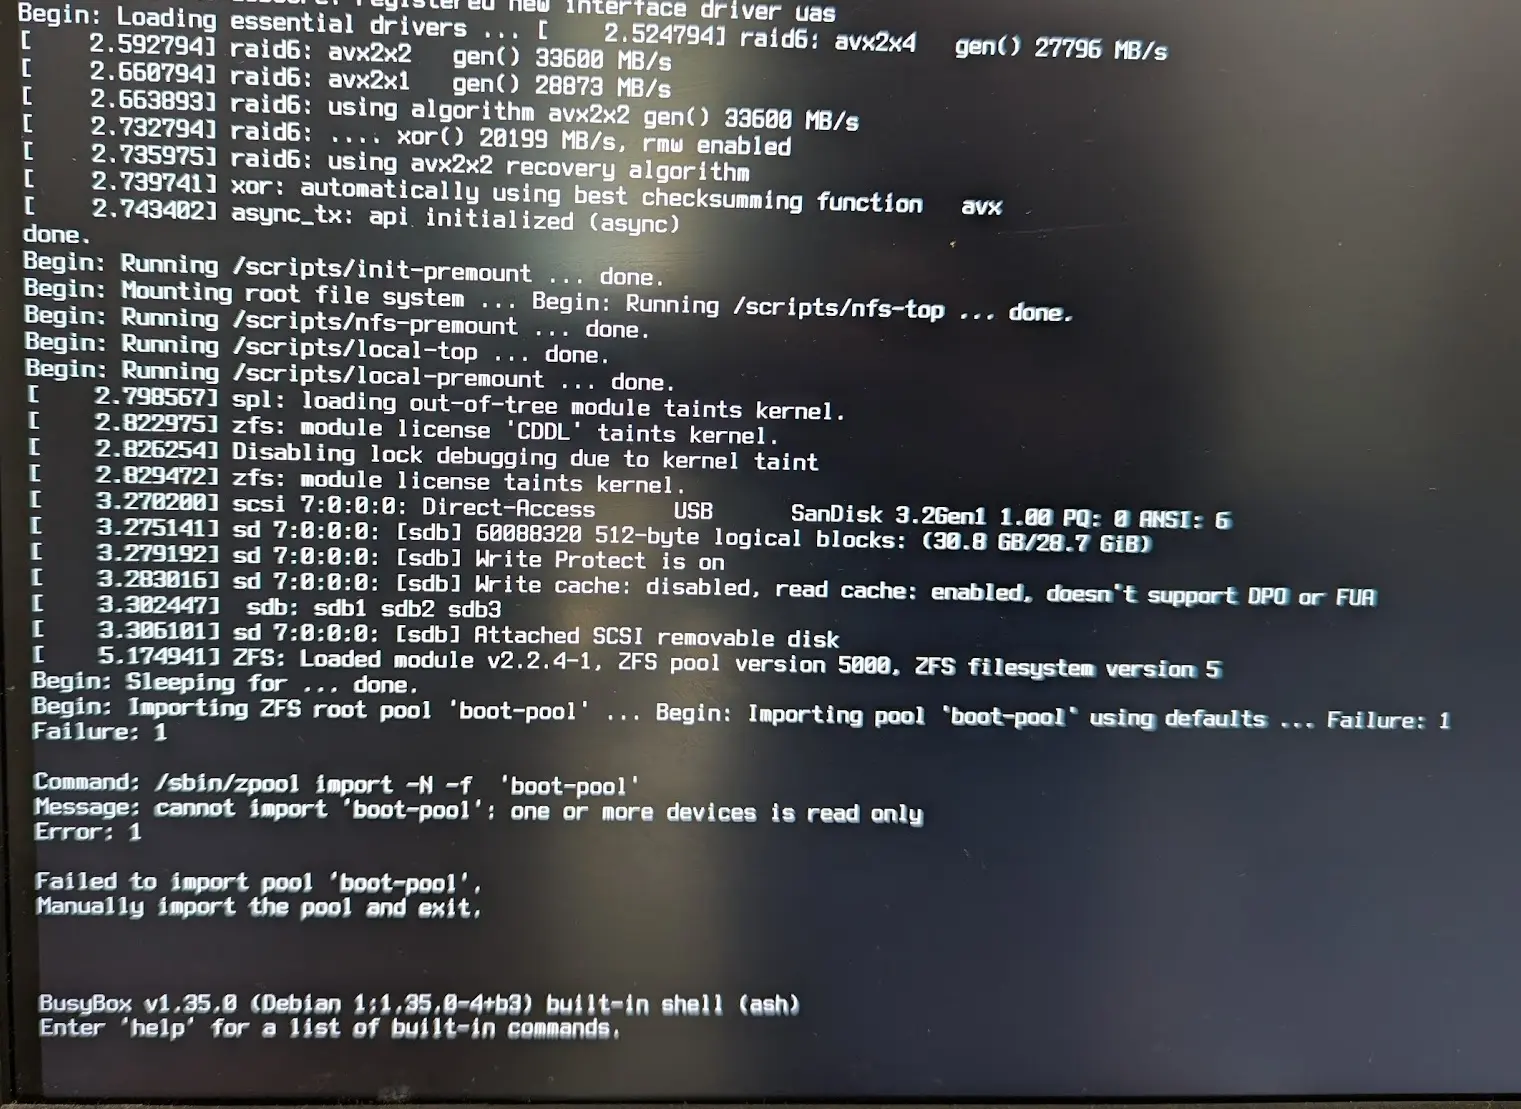
Luckily I could dump the drive as a disk image on my Mac after installing OpenZFS. More on this on a later post about TrueNAS ZFS backups!
Also, another lucky thing is that even a newer generation (and super fast) SSD USB drive like Transcend 256GB ESD310C is only £30 now, so waiting it out might have been a good move. Wish me luck restoring the data on it!